

This guide explains how to set up a Search Atlas project and recreate key workflows after migrating from Ahrefs.
How do I set up my project in Search Atlas?
Configure your workspace to enable tracking, automation, and performance insights.
Create a new project
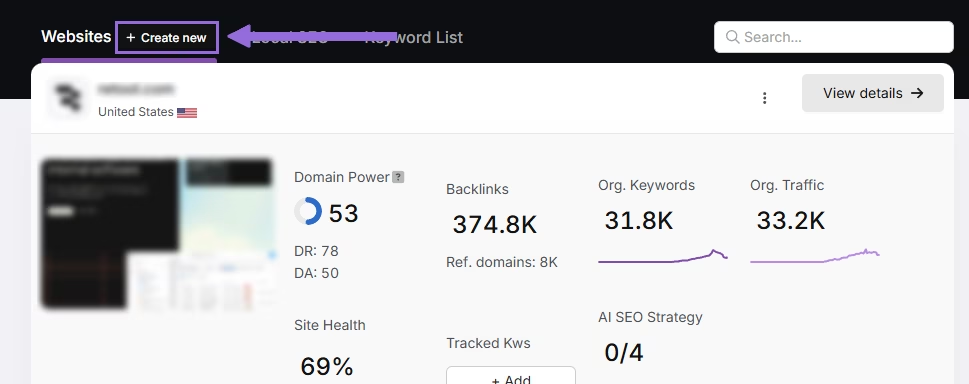
- Log in to your Search Atlas account, scroll down in the main Dashboard, and click + Create new.
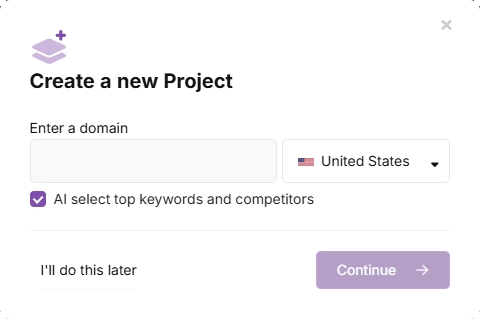
- Enter your domain, select the target country, and optionally enter primary keywords for tracking.
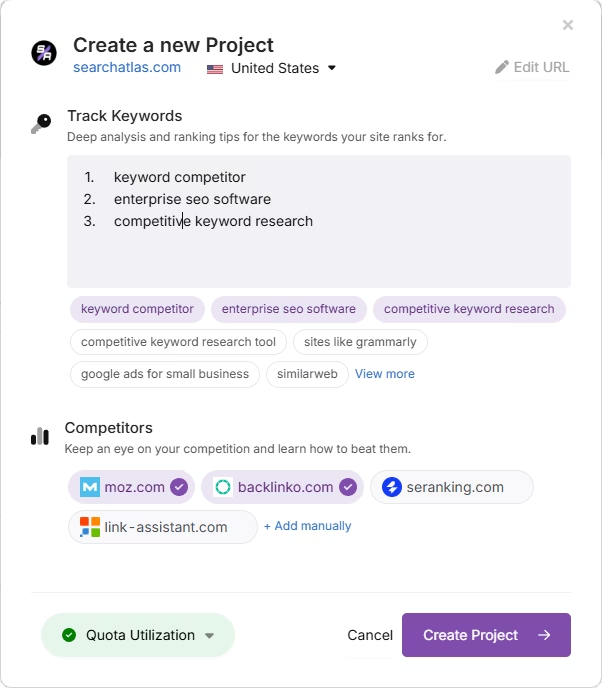
- Add or remove recommended keywords and add your main competitors. You can change both options later.
Connect key integrations
Google Search Console (GSC)
- Click Site Metrics > All Sites > Connect GSC Account.
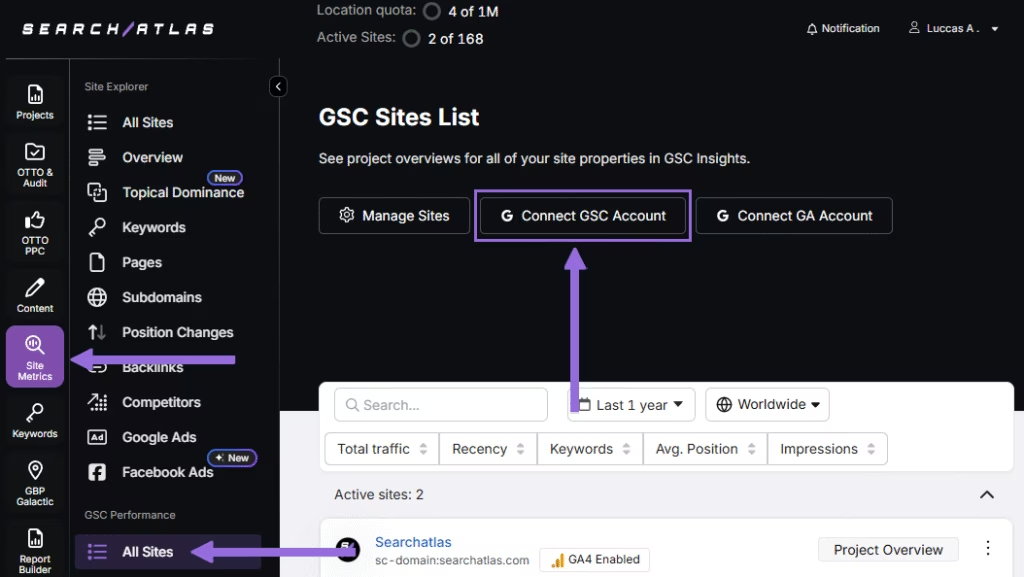
- Authorize access and connect your verified property.
- After GSC is connected, go to Manage Sites.
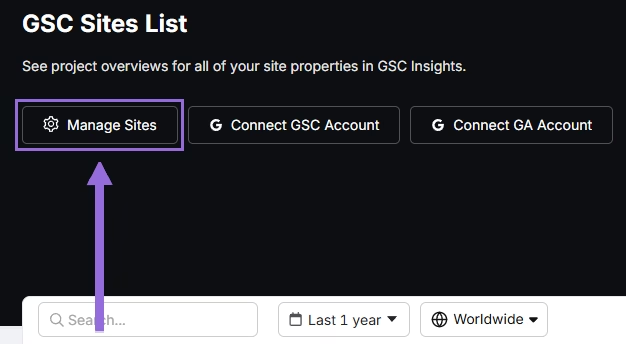
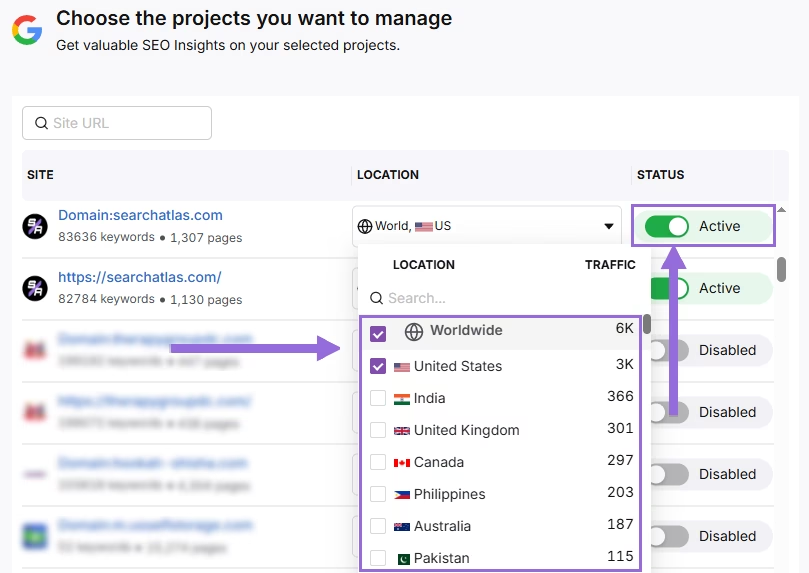
- A slider will show all imported GSC properties, which are disabled by default. Find your domain and click Enable.
Google Analytics 4 (GA4)
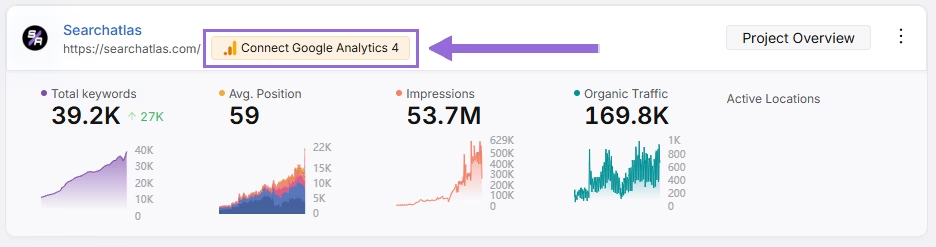
- From your GSC Performance dashboard, click Connect Google Analytics 4.
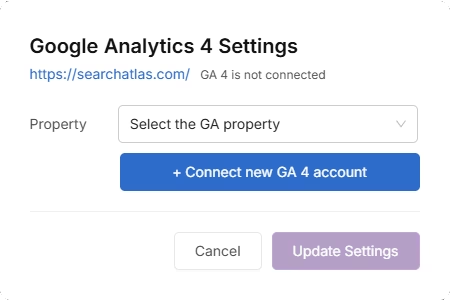
- Select your GA property or connect your GA4 account. Authorize access and connect your verified property.
Once enabled, Search Atlas will automatically link keyword data, impressions, CTR, and engagement metrics. You can use publicly shareable links for verification if needed.
How do I export site audit data from Ahrefs and set up an audit in Search Atlas?
You do not need to import Ahrefs site audit data into Search Atlas. Search Atlas performs fresh technical scans with actionable insights using the Site Auditor.
Export from Ahrefs
Save this data for reference to historical audits; it will not be imported into Search Atlas.
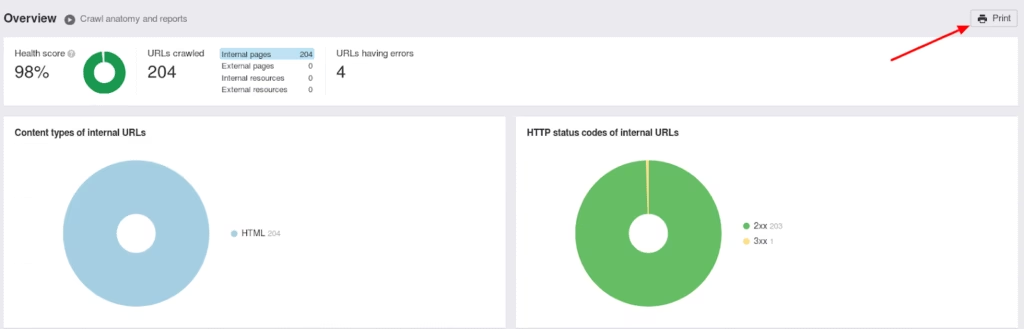
- Go to Site Audit > Crawl Log or the Issues tab. Click the Print button on the Overview tab, choose a location on your computer, and click Print to save the file as a PDF.
- To export detailed issue lists, click a specific issue to open its detail view, then open the list of affected pages. Click Export and choose the data to export in CSV or XLSX format.
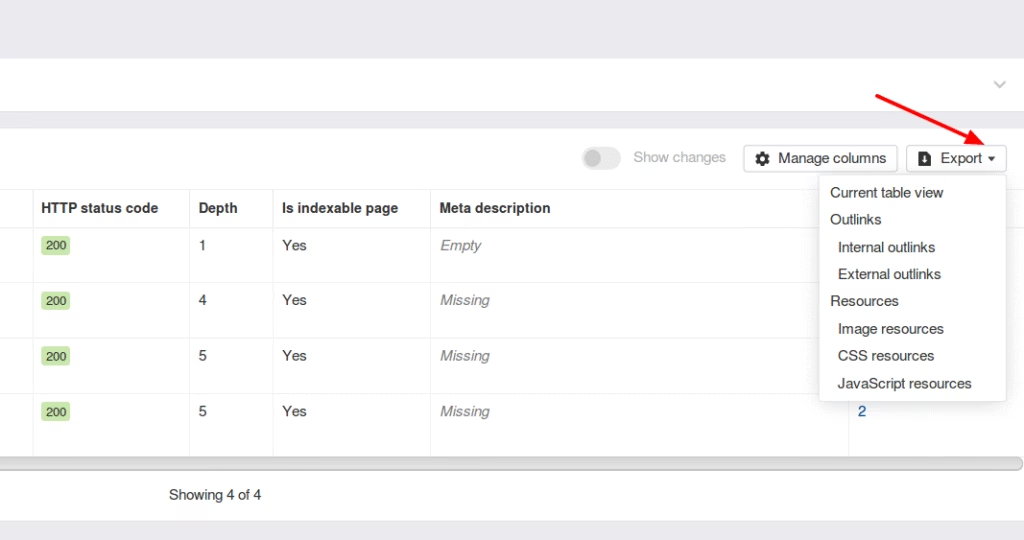
Ahrefs currently does not support exporting a full list of all issues and associated URLs in a single download.
Set up a site audit in Search Atlas
- Go to OTTO & Audit > All Audits > Site Auditor.
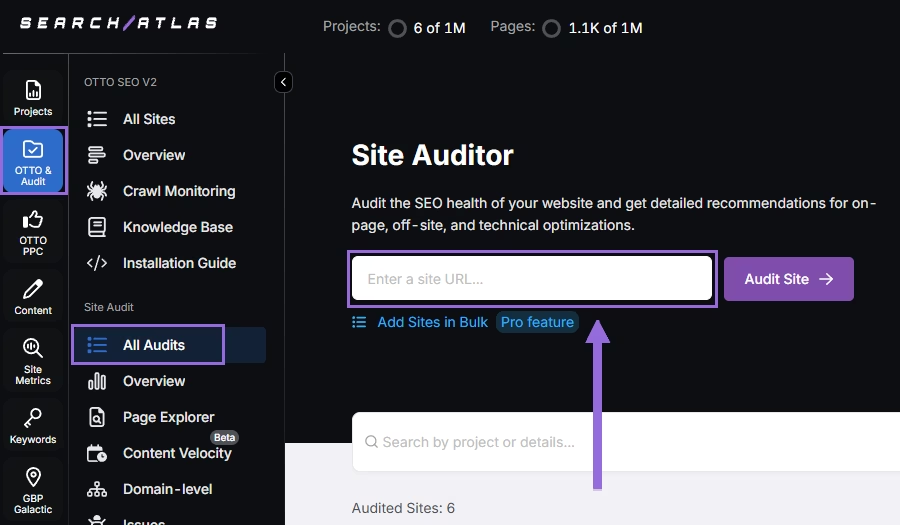
- Enter your domain and configure crawling options:
- User agent (use Search Atlas bot recommends for best accuracy)
- Number of pages to crawl (default is 100)
- Adjust crawl speed (default is 20 pages per second)
- Set crawl frequency (default is every 7 days)
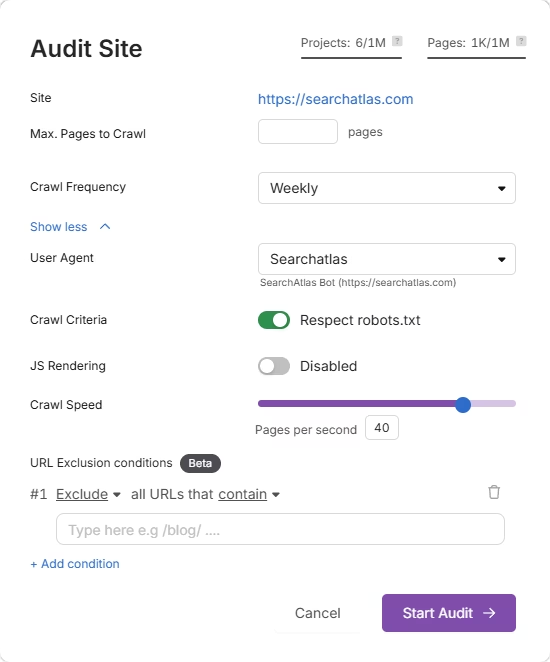
- Run a full scan to launch the crawl across all pages under that domain.
How do I use bulk auditing?
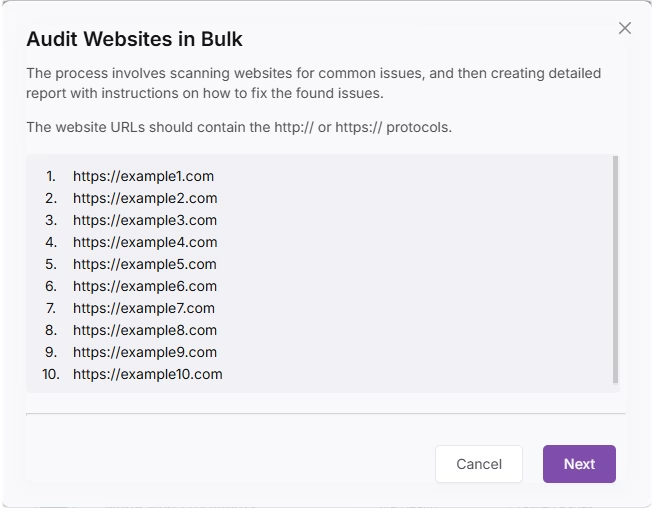
For agencies or multi-site audits, go to Update Sites in Bulk and paste multiple domains to queue audits simultaneously.
How do I export Ahrefs keywords and track them in Search Atlas?
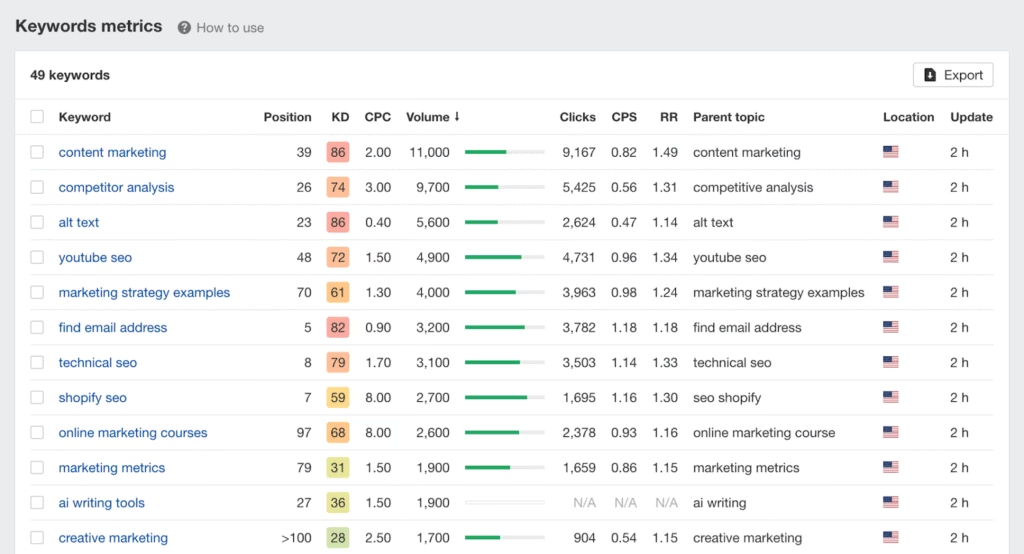
Export keywords from Ahrefs
- Go to Rank Tracker > Keywords.
- Click Export and include keyword, location, tag (if applicable), and current position data.
- Export all tracked keywords in CSV format.
Set up keyword tracking in Search Atlas
- Go to Keywords > Keyword Rank Tracker.
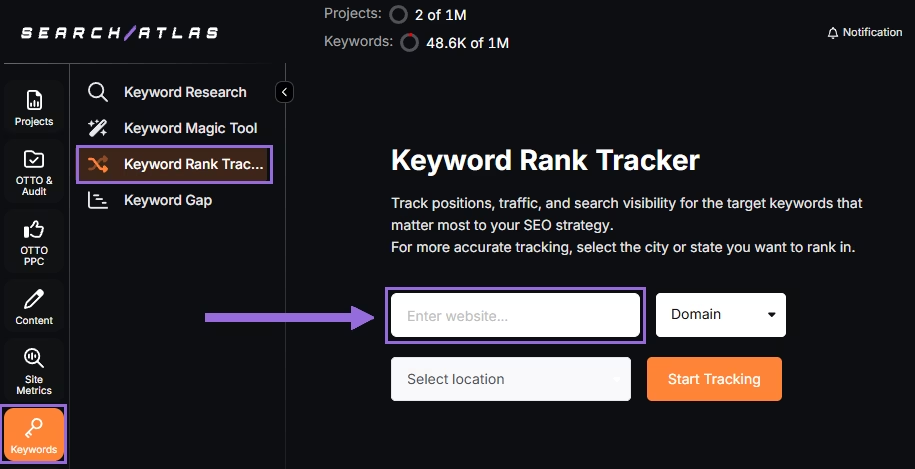
- Enter your domain or target page and specify the target location (country, state, city, county, or province).
- For example, track rankings for searchatlas.com in Las Vegas, Nevada.
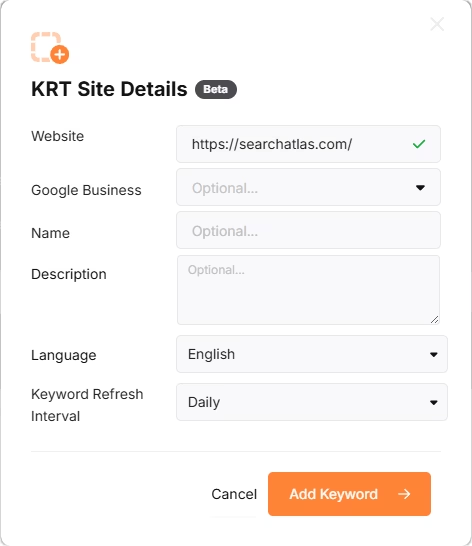
- Click Start Tracking and connect your Google Business Profile (GBP), if applicable. Enter your project name, description, language, and keyword refresh interval (Daily, Weekly, Monthly, or Custom).
- Search Atlas will automatically recommend keywords. You can select those keywords or paste keywords manually from the Ahrefs CSV.
How do I set up local SEO and a GBP project in Search Atlas?
You can export some relevant data from Ahrefs for use in your local SEO setup.
Export local keywords from Ahrefs
Go to Keywords > Keyword Rank Tracker. Filter your local keywords, then export keywords and any relevant data for your local SEO strategy via CSV, or gather it manually for migration.
Connect your GBP listing
- Go to Local SEO > Connect GBP and link your verified listing.
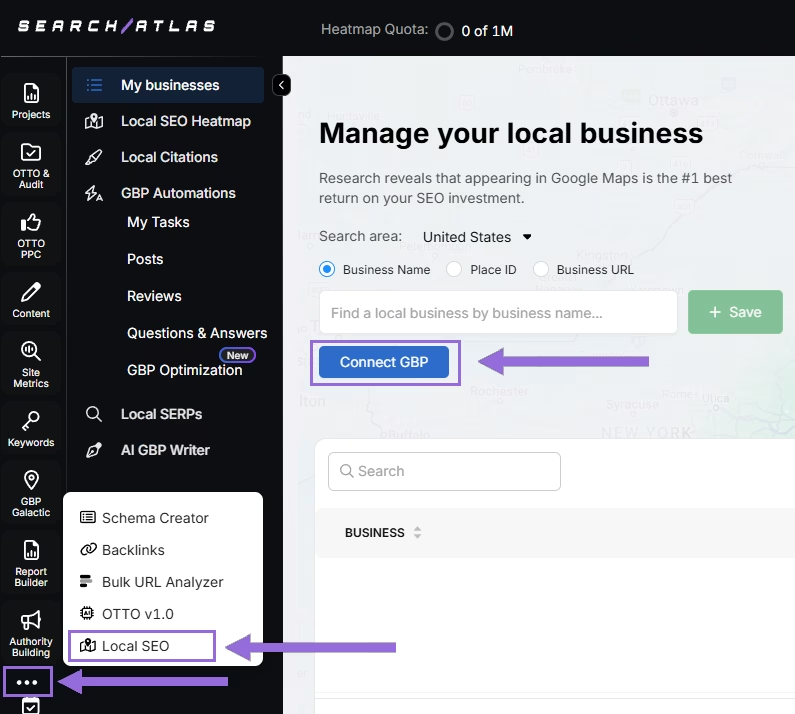
- Authorize access and connect your verified property.
Select your business
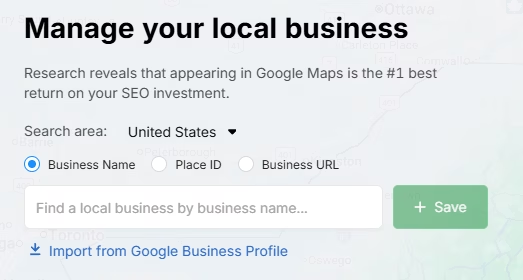
- Search by business name, Place ID, business URL, or import via email invitation.
- Click + Save to create your local SEO project.
Configure the heatmap
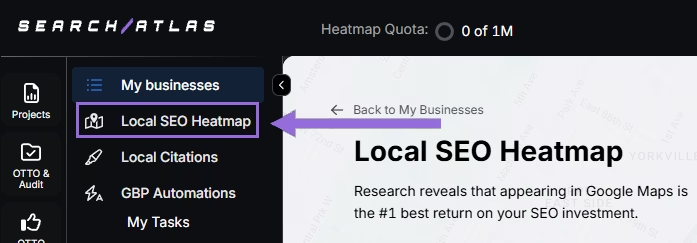
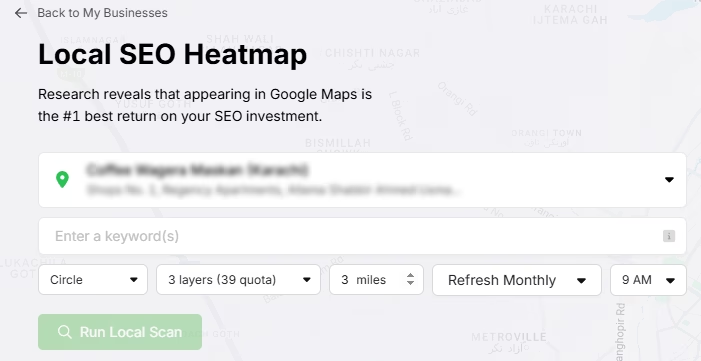
- After GBP is connected and the project is saved, go to Local SEO > Local SEO Heatmap.
- Add the keywords to track, choose circle or rectangle to define the tracking area, and set the radius. The recommended settings are:
- 3–5 miles → Use 3 layers or grids
- 10–25 miles → Use 4–5 layers or grids
The larger the mile radius, the more layers or grids you should use. This recommendation increases grid density for wider coverage.
- Schedule refresh intervals and choose specific times when your business is open. Avoid midnight or off-hours, as they may show lower ranks than actual performance.
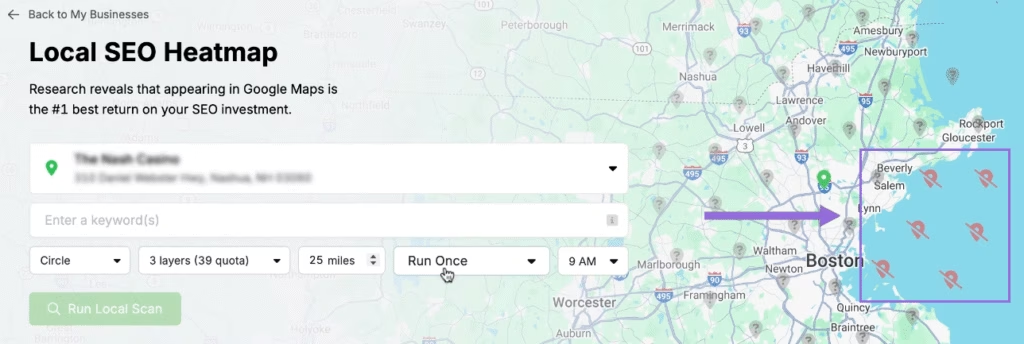
Click on the pins to omit unnecessary ones (e.g., uninhabited areas) to save quota and avoid skewed average ranks.
Edit existing reports
- Click an existing project and click at the top of the page.
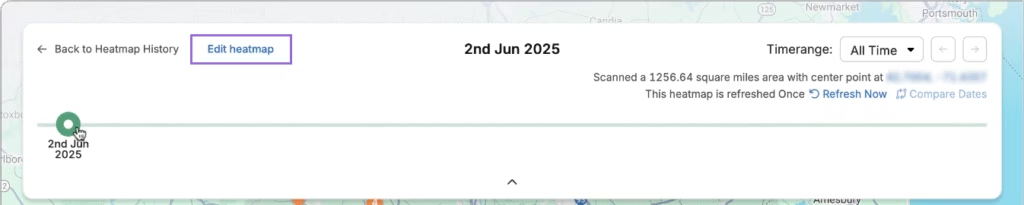
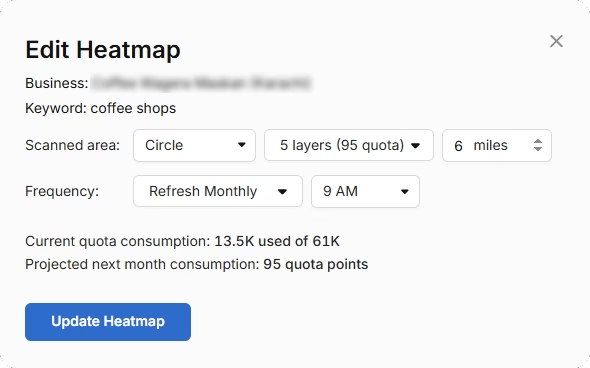
- A timeline will show ranking progress over time. Click Edit heatmap to change the configuration.
Compare competitors
- To compare the business’s rankings against competitors in the area, click an individual pin you want to target.
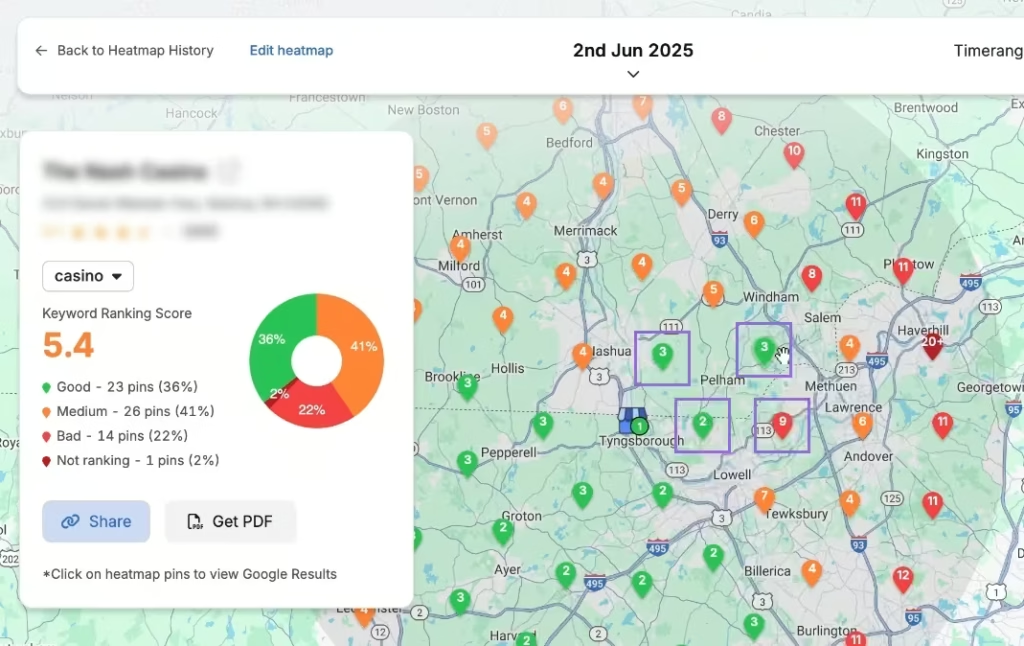
- A list of local competitors for the same keyword and pin will appear. Click Compare to choose a competitor.
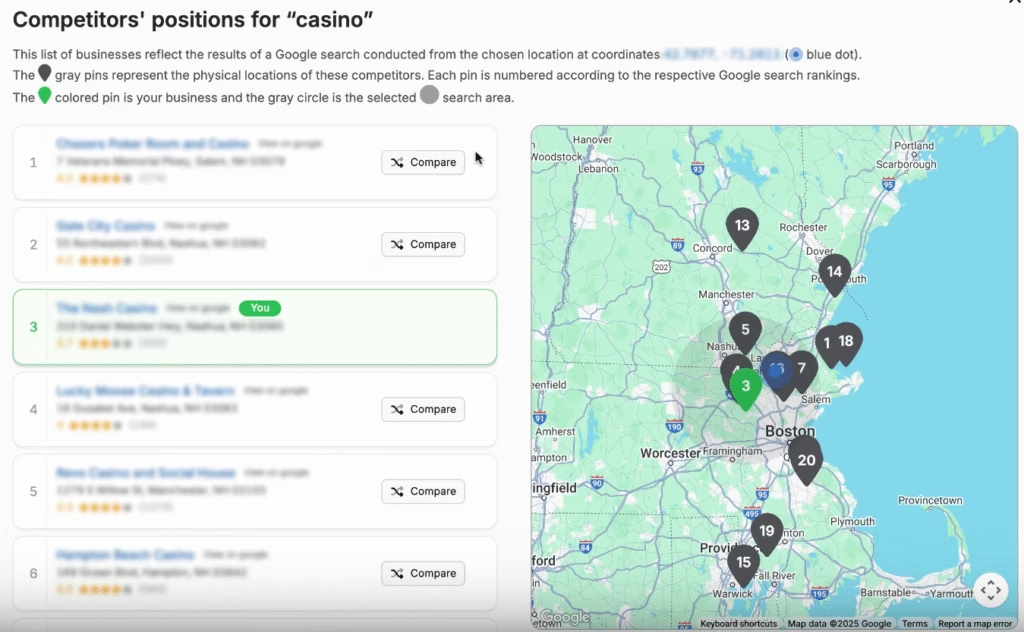
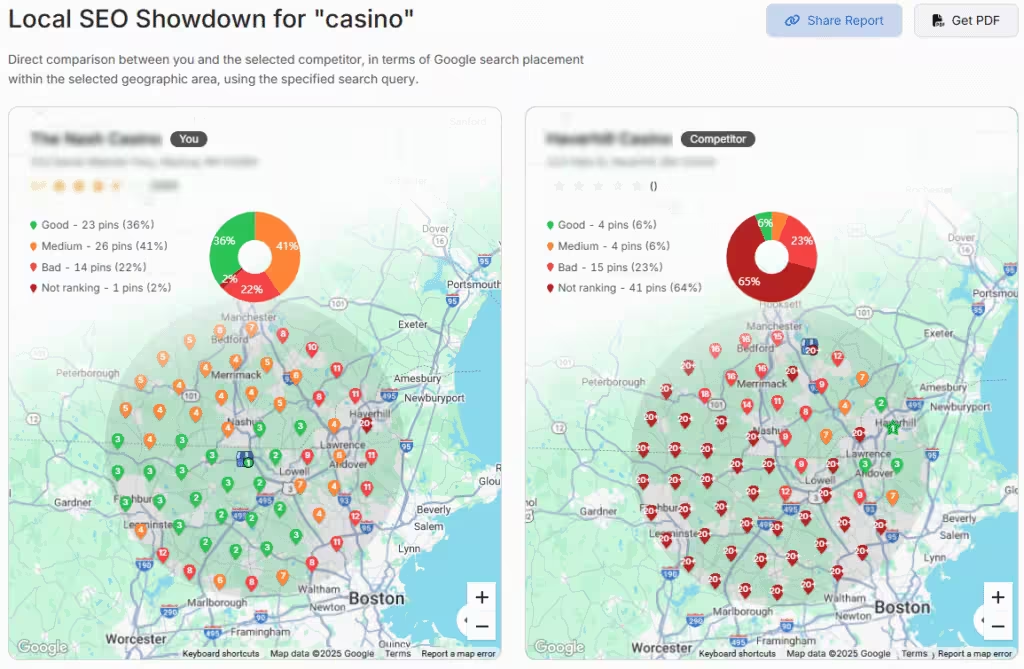
Your business and the selected competitor will be compared side by side. You can move the camera, zoom out, and zoom in to analyze the region.
Set up a local rank tracker
- Go to Keywords > Keyword Rank Tracker.
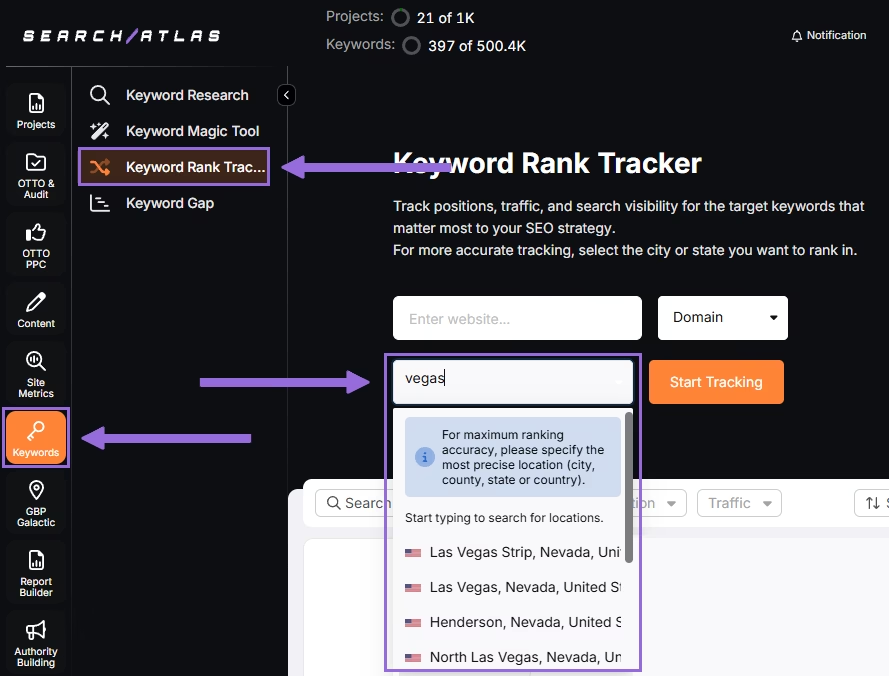
- Enter the business’s website or target page, select the exact location being targeted, and click Start Tracking.
- Set the device preference, language, frequency, custom naming, and campaign or view description.
- Add the local keywords from your Ahrefs sheet.
Add multiple locations
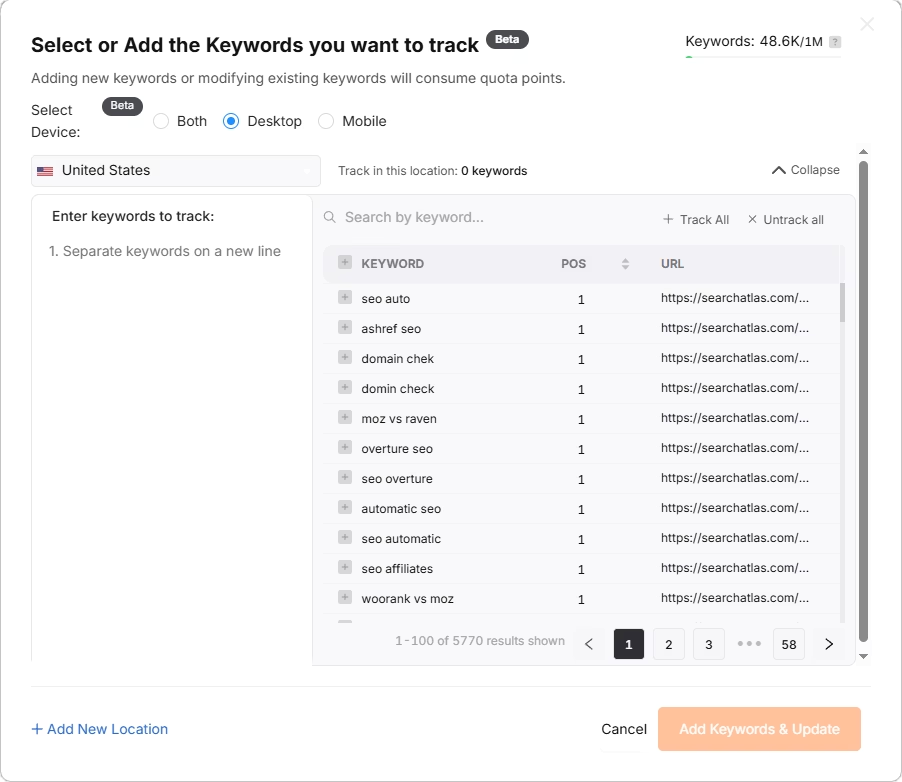
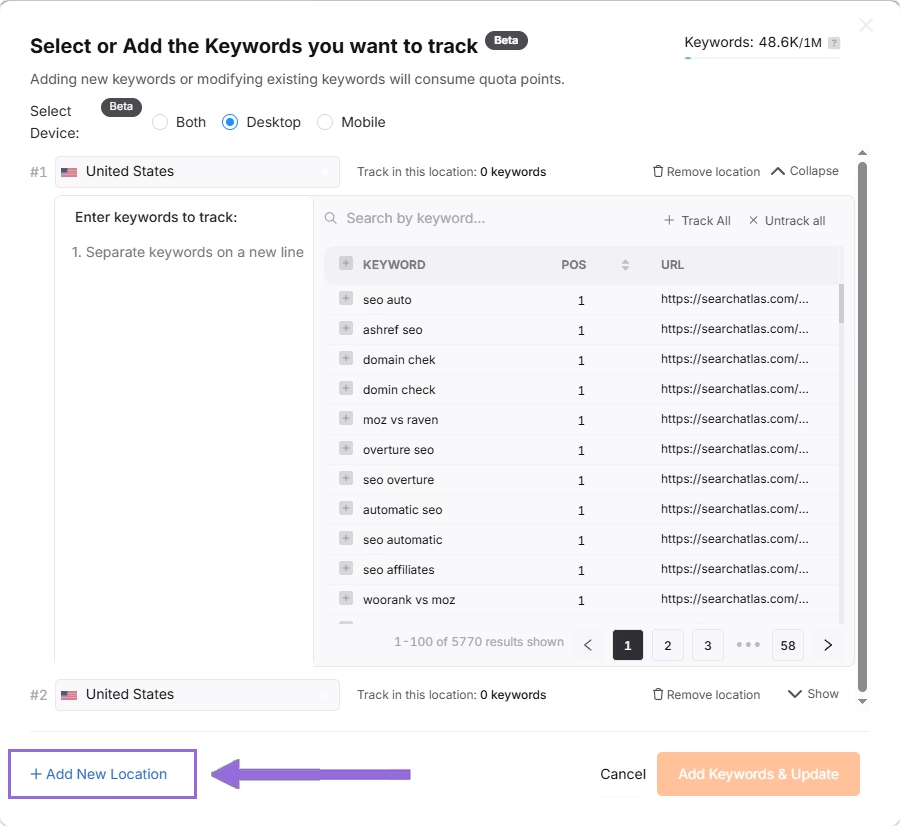
If you have multiple businesses for the same project, click + Add New Location to track keywords for multiple locations in one report (e.g., Las Vegas and New York) and assign different keyword sets to each.
How do I export Ahrefs reports and create reports in Search Atlas?
There is no direct way to import reports from Ahrefs into Search Atlas. You can create equivalent reports in Search Atlas using the Report Builder.
Export reports from Ahrefs
- Navigate to Dashboard > Reports and click Print in PDF to download previously configured reports in PDF.
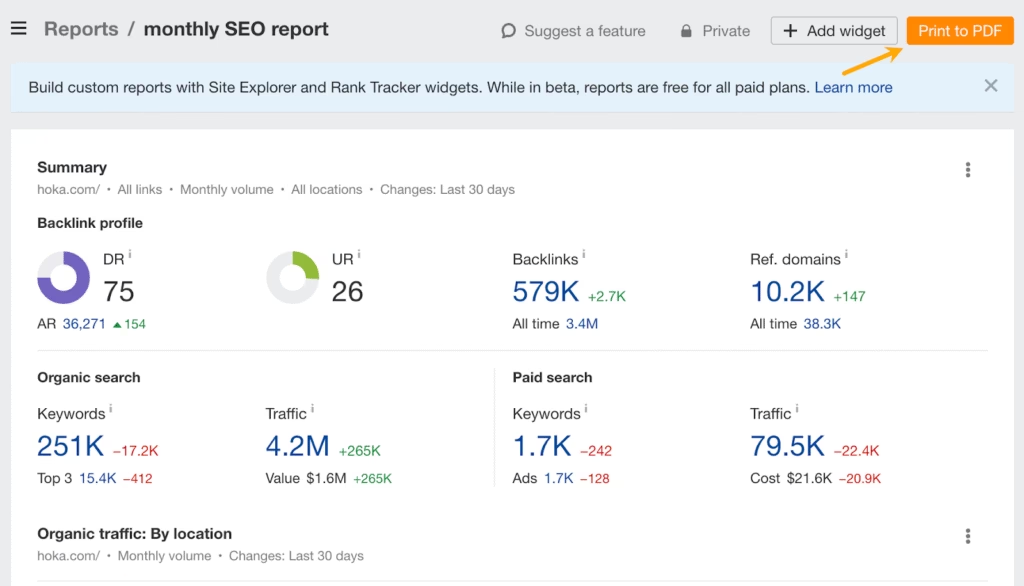
Save them for future reference or comparison if you have created custom report templates.
Create a report in Search Atlas
- Go to Report Builder > Report List.
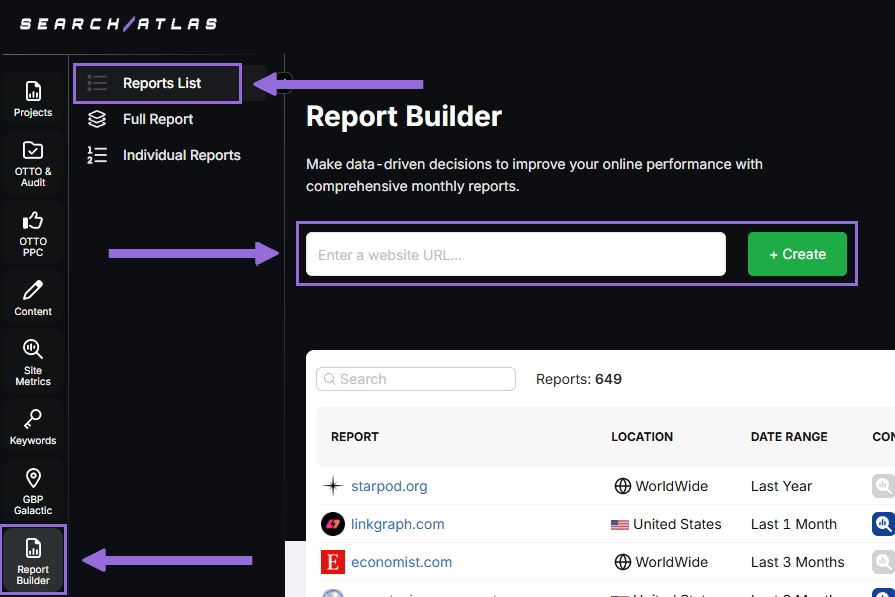
- Choose the location, date range, and the widgets to include in the report, such as:
- AI Summaries
- Site Explorer
- OTTO SEO
- Orders & Tasks
- Google Analytics data
- Google Search Console data
- Facebook Ads
- Google Ads
- Google Business Profile
- Keyword Rank Tracking
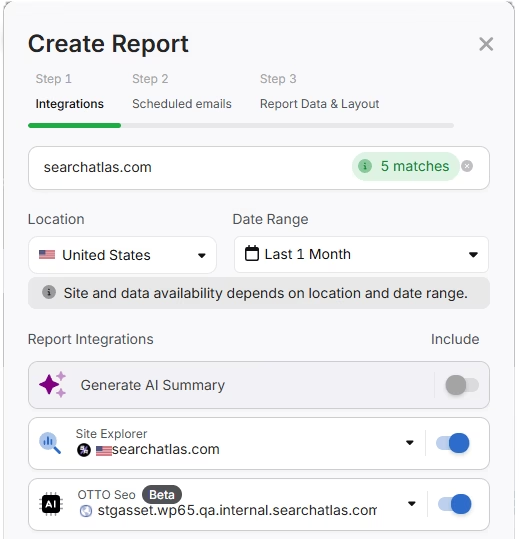
- Schedule automated reporting by adding recipients, selecting the email frequency (weekly, monthly, or quarterly), and choosing the day of the week the report will be sent.
- Choose between Default Layout and Custom Layout, then create the report.
Customize the report
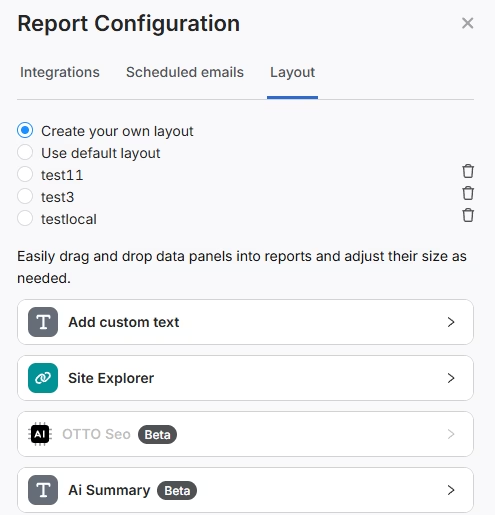
- After creating the report, click Configure Report to change the Integrations, Scheduled emails, and Layout.
- In Layout, you can customize the report.
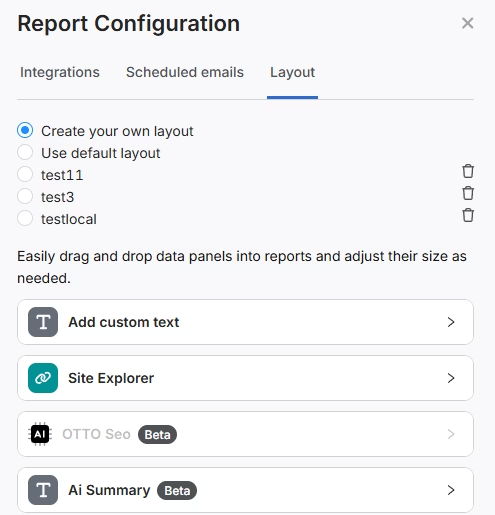
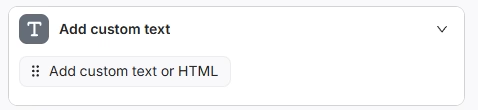
- Click Add custom text to add your own text or HTML, including branding such as a logo, banner, and links.
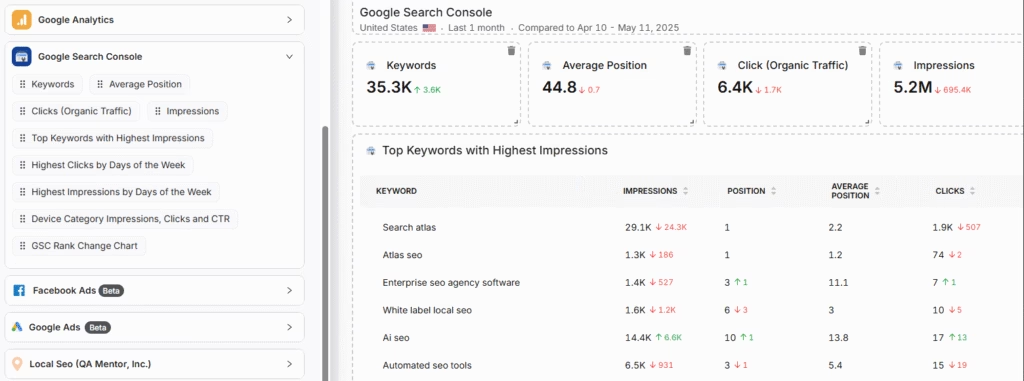
- Scroll down, then click and drag each metric into the report. You can choose where to add each one.
Add AI summaries
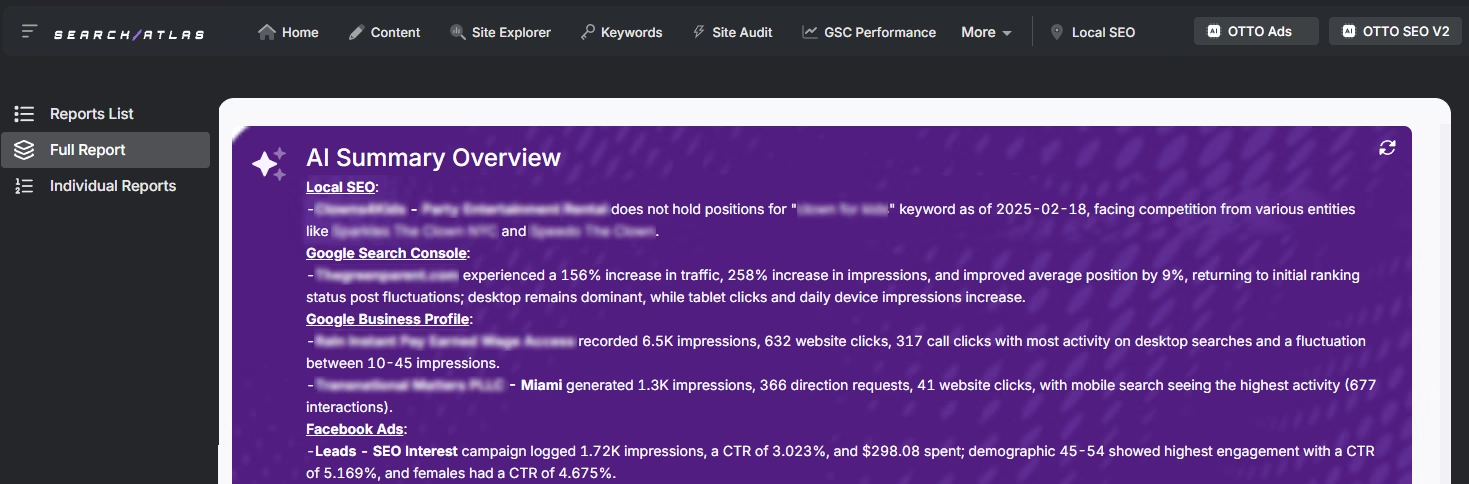
In Integrations, you can add the AI Summary Overview. These automated overviews highlight key points in your report to help you and your clients understand the results.
Create a local SEO report
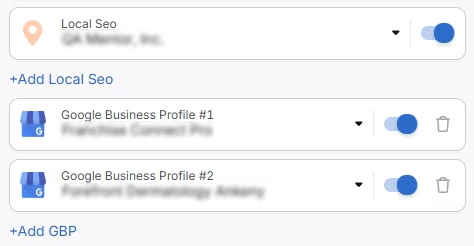
- Click Configure Report and navigate to the Local SEO and GBP Section. Integrate as many Local SEO projects and GBP Accounts as necessary for the report.
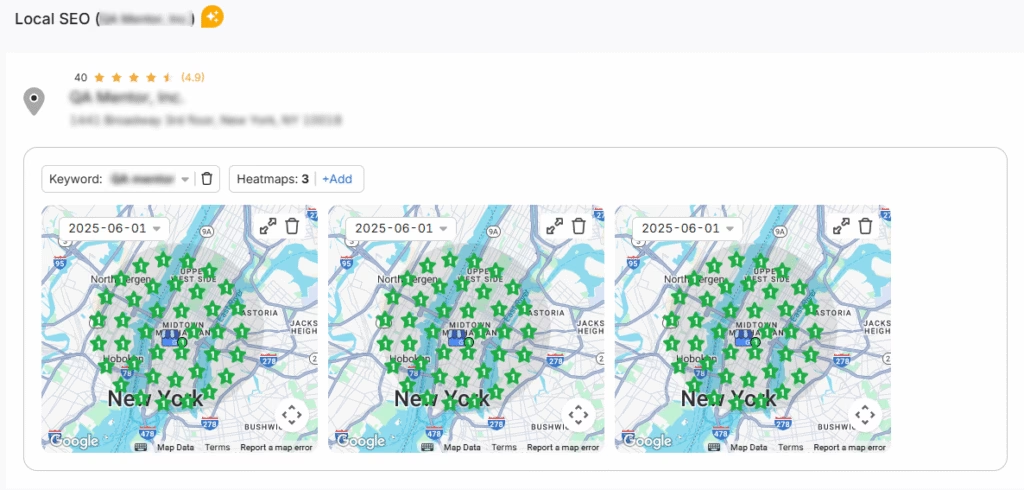
The previously configured heatmap for each Local SEO project will be added to the report automatically. You can customize them.
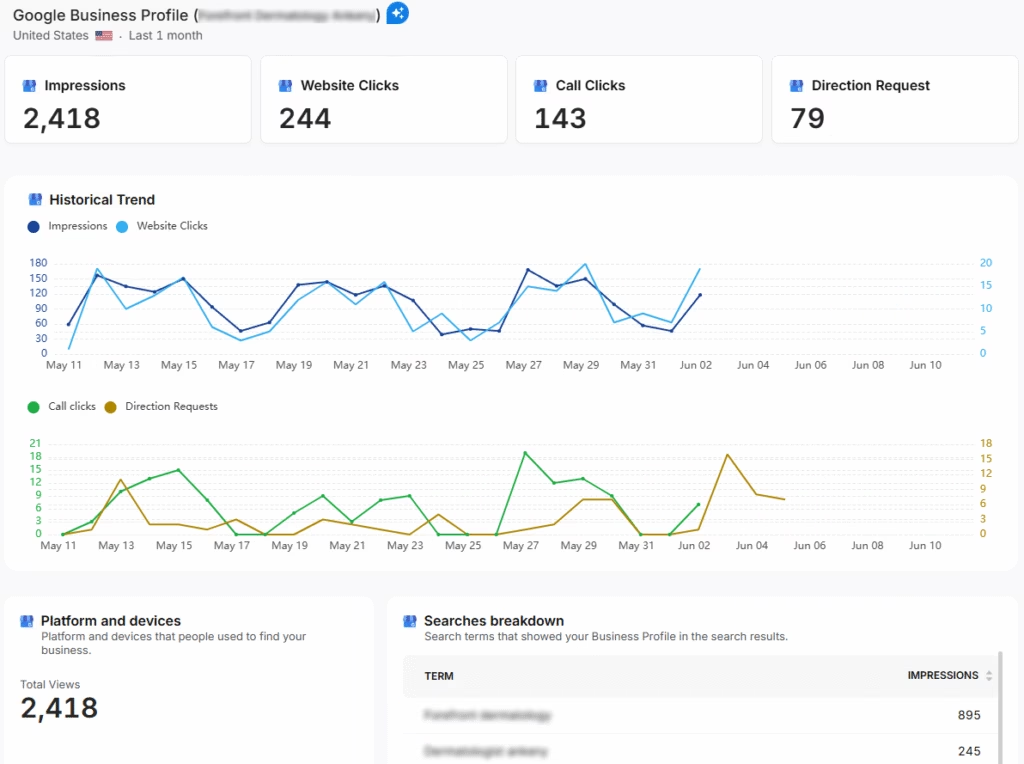
GBP data will be added to the report automatically. Each metric is customizable.
Share the report
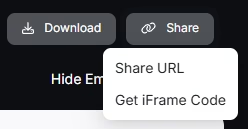
After configuring your report, download it as a .PDF, or share it via Share URL or Get iFrame Code.
iFrame Code is an HTML element that allows you to embed another HTML page within your own.
Set up white label reporting
Search Atlas lets you white-label your dashboard and URL. Go to Agency White Label and set your custom dashboard URL and logo.
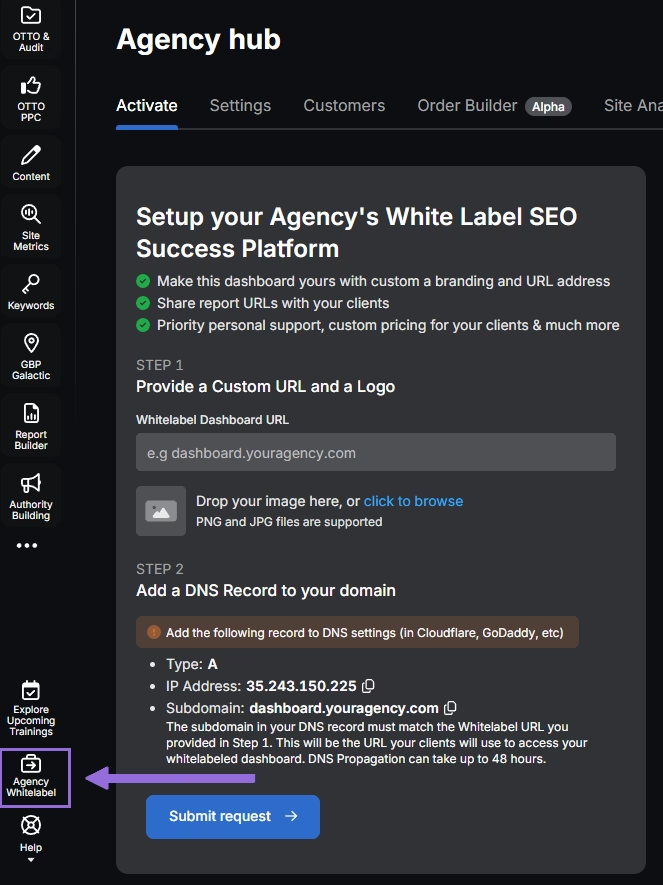
When you share your report via Shareable URL, it will display your logo and URL.
How do I enable automated SEO optimization with OTTO SEO?
You can set up OTTO SEO, an AI agent that automates SEO tasks, including technical audits, on-page optimization, link building, content creation and optimization, Local SEO and GBP optimization, and more.
Complete the Site Audit on your project before activating OTTO.
Install OTTO SEO
- Go to Projects > + Add a Website.
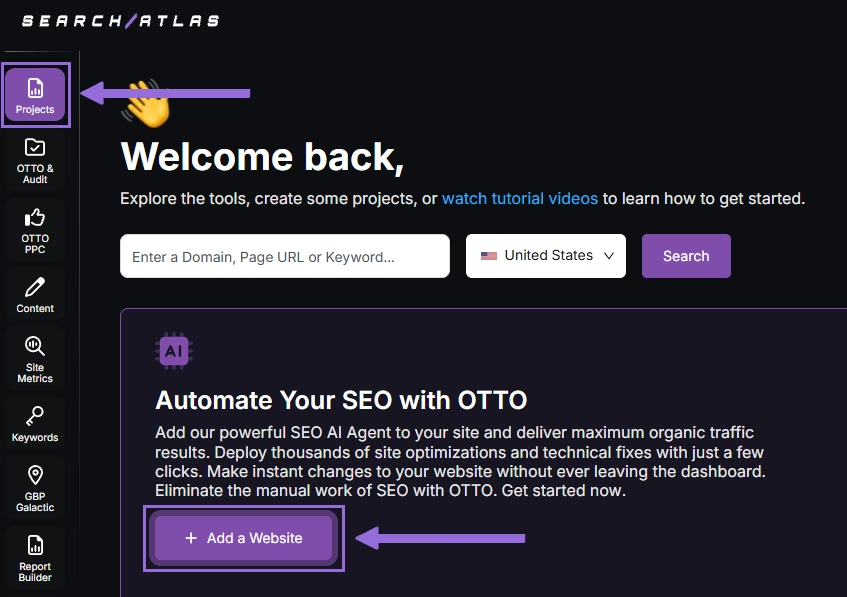
- Select a project that does not have OTTO installed, or add a new website.
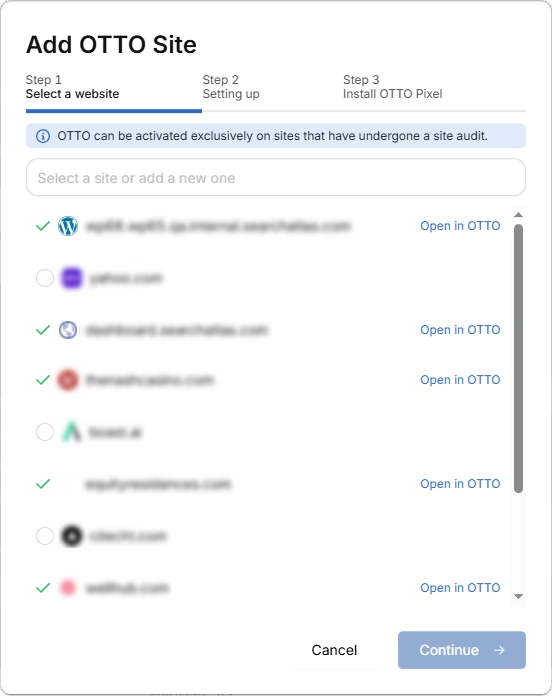
- Select the GSC and GBP, and add your business details.
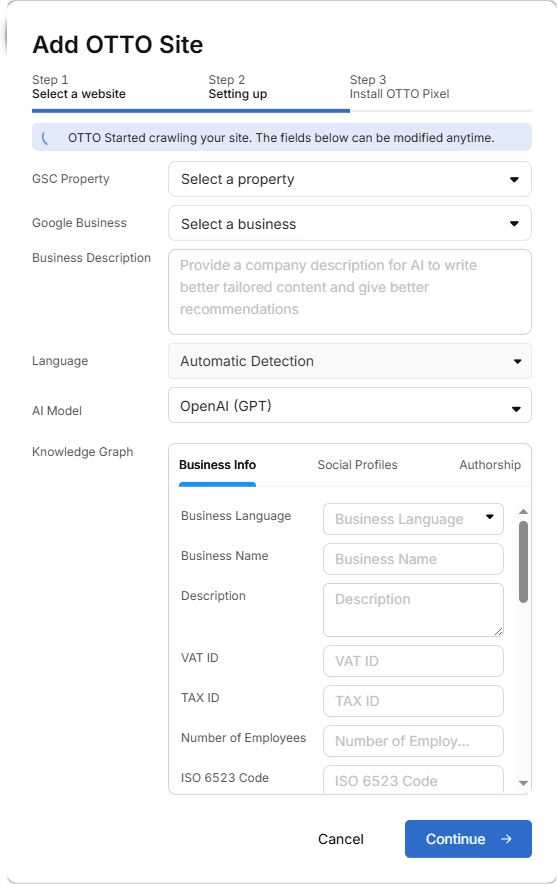
- Proceed through the tutorial to install OTTO.
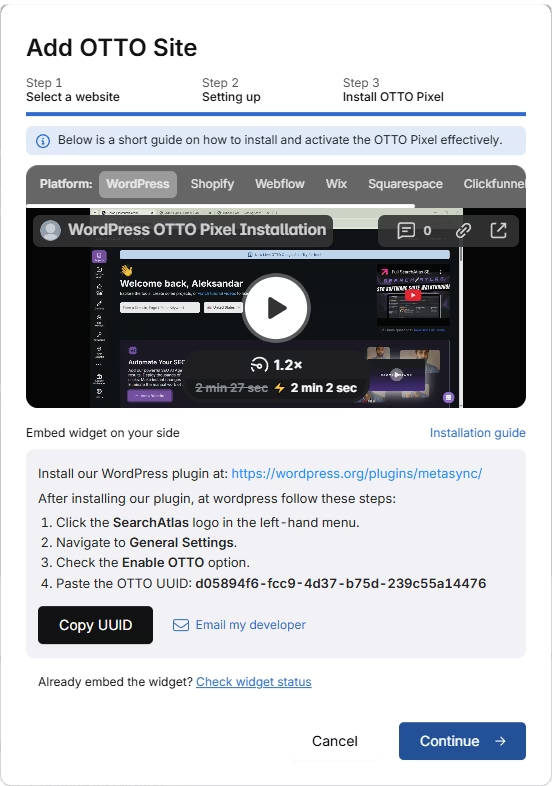
Install OTTO on another CMS
Go to OTTO & Projects > Installation Guide. Short tutorials are available for:
- Google Tag Manager
- WordPress
- Shopify
- Webflow
- Squarespace
- ClickFunnels
- Wix
- GoHighLevel (GHL)
- Custom Installation
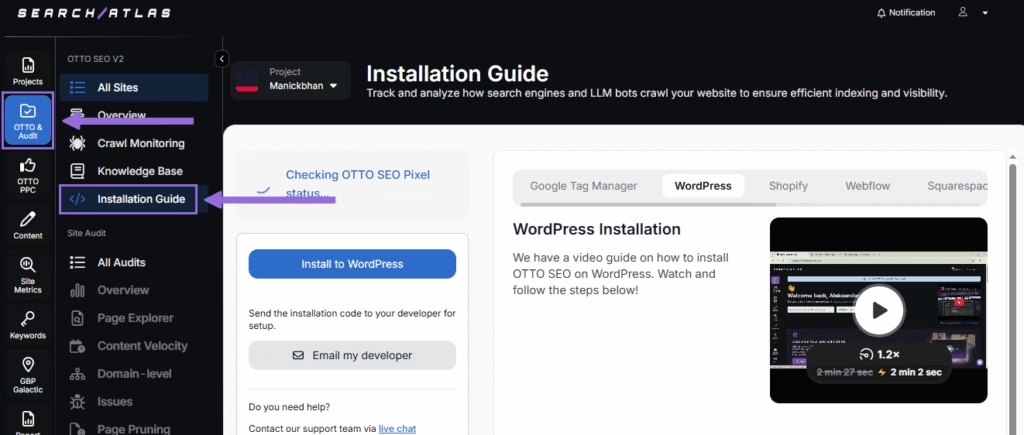
Here is a recap of how to install OTTO SEO on WordPress.
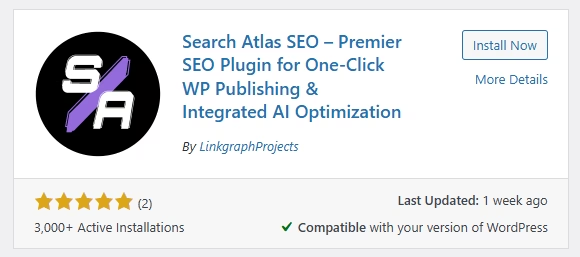
- Go to your WordPress dashboard and open the Plugins section. Search for “Search Atlas” in the plugin directory. Click Install Now, then activate the plugin.
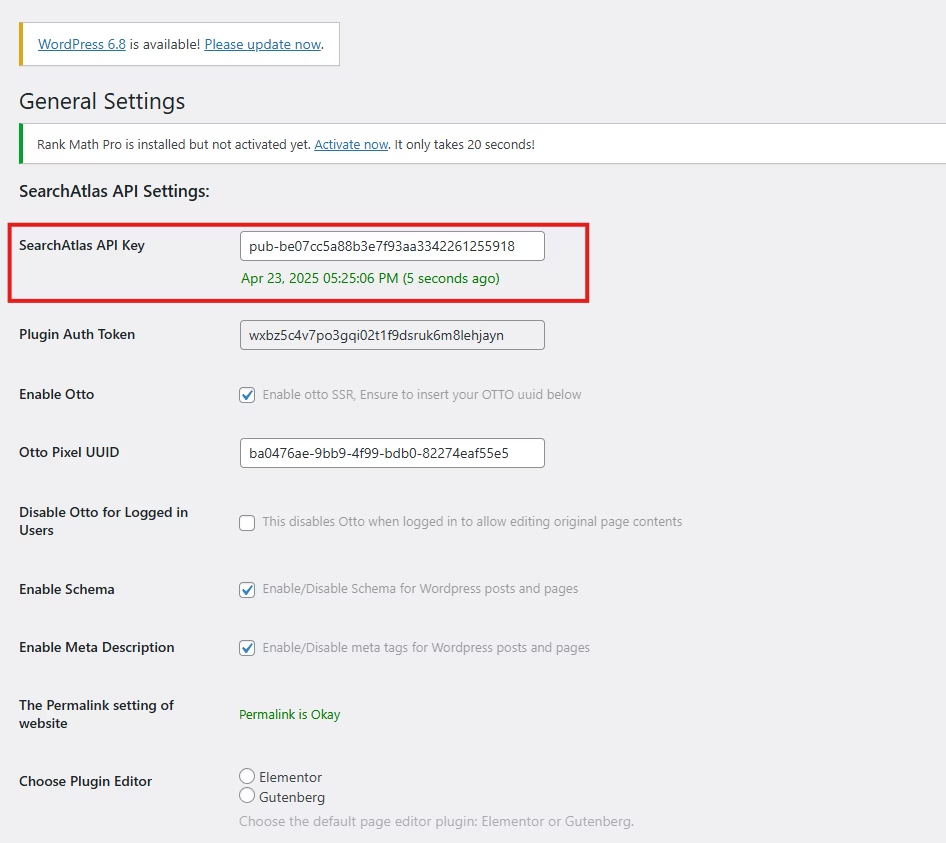
- Copy the API key provided during setup. Open the Search Atlas plugin settings by clicking the Search Atlas logo in the left-hand menu. Go to General Settings. Paste the API key into the Search Atlas API Key field and continue.
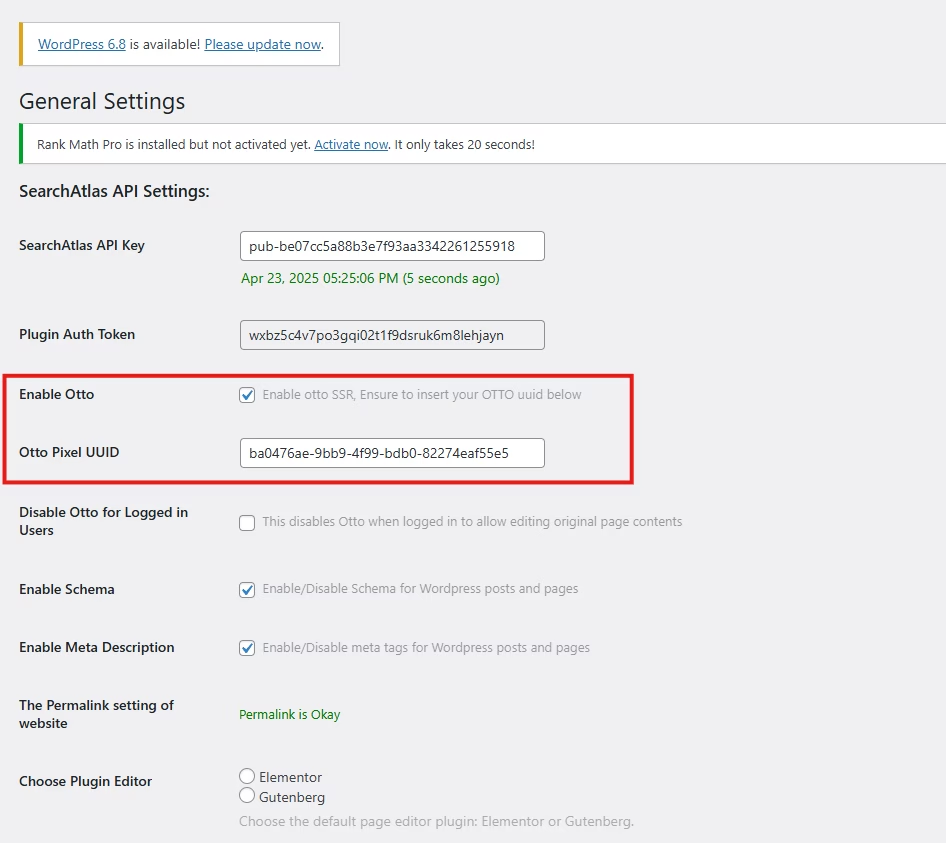
- Copy the code provided in the next step. Return to your WordPress dashboard and open the plugin settings again. In General Settings, check the Enable OTTO box. Paste the code into the OTTO Pixel UUID field and save changes.
OTTO SEO will then run inside WordPress, automating fixes and SEO updates across your site.
How do I configure OTTO SEO?
Use the tutorial for configuring OTTO Autopilot and settings.
How do I use the Search Atlas onboarding resources?
Watch tutorial videos
Step-by-step tutorials on YouTube can help you set up reports, dashboards, and automations.
Book a 1:1 onboarding session
During your trial, you can schedule a 1:1 onboarding session directly from the dashboard. A product expert can help you customize your setup, connect integrations, and configure OTTO SEO for automation.
Follow the 7-day email campaign
When you start your free trial, you’ll receive a 7-day onboarding email sequence. Each email covers a core feature.
Find technical documentation
Access the technical docs in the Help Center for instructions on using the tools.