

This guide explains how to move local SEO workflows from BrightLocal to Search Atlas, including keyword tracking, GBP management, citations, and white-label reports.
How do I export my local keyword and grid tracking data?
Export keyword data from BrightLocal’s Local Rank Tracker and map visibility data from Local Search Grid.
How do I export from the Local Rank Tracker?
The Local Rank Tracker tracks a list of keywords in a specific location.
- Log in to your BrightLocal account. If you have an existing location, go to All Locations.
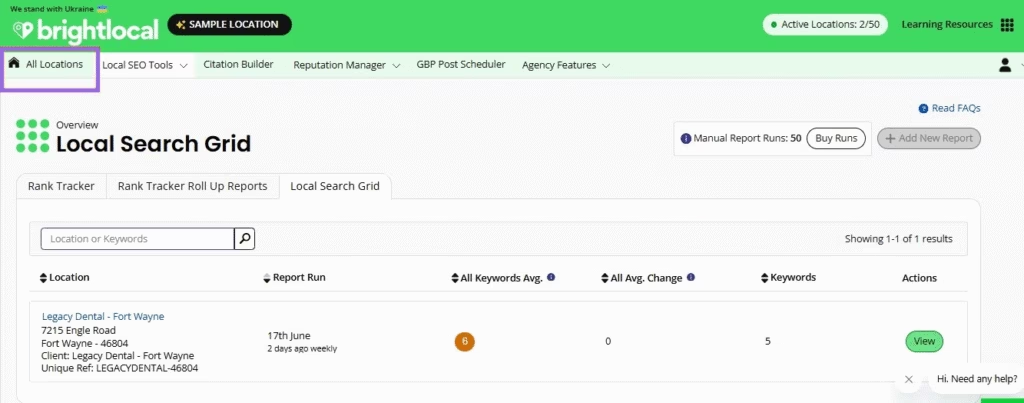
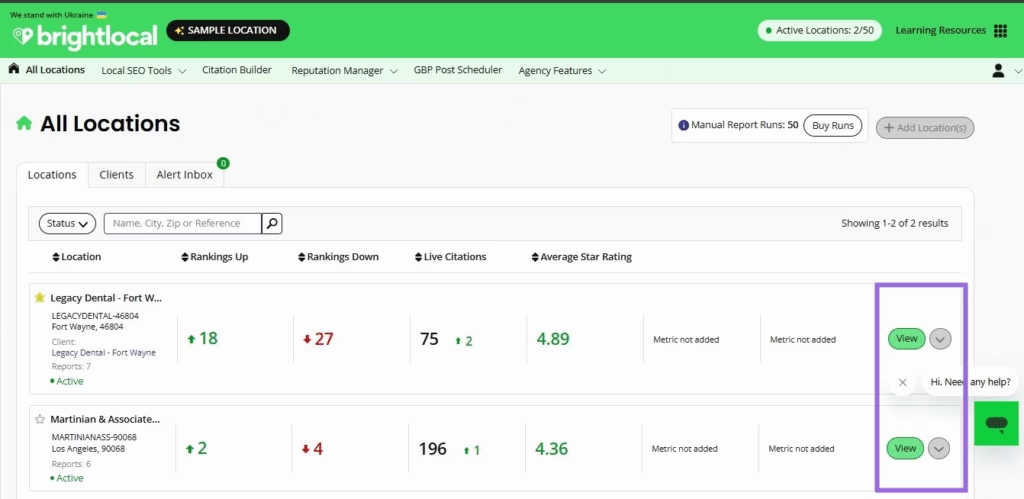
- Click View on your business.
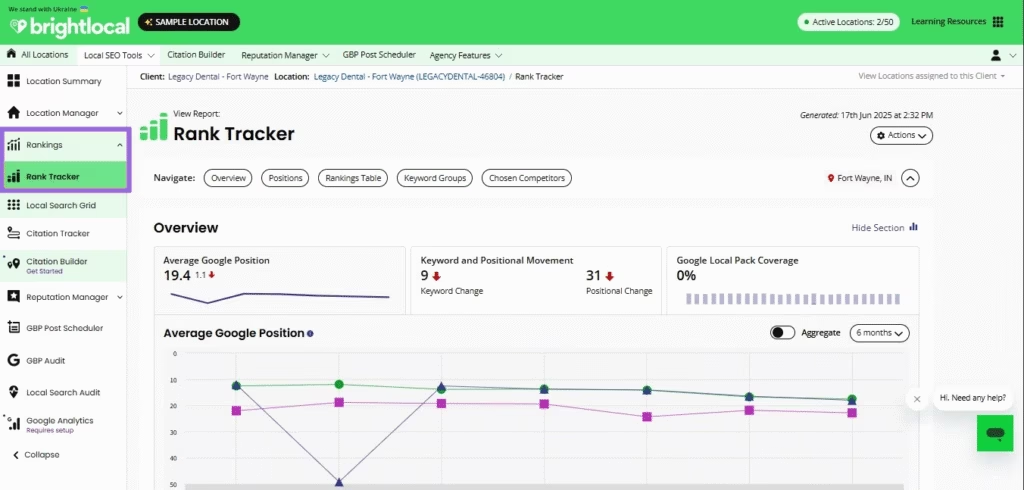
- Choose Rankings >Rank Tracker from the sidebar.
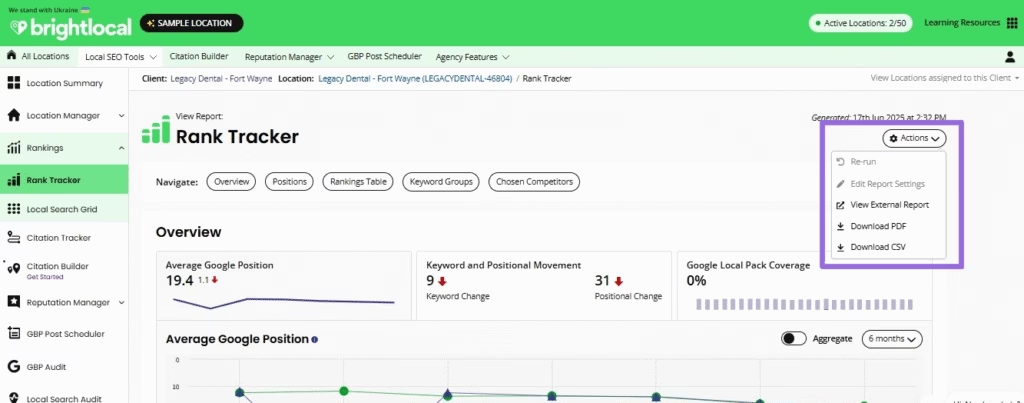
- Click the Actions dropdown at the top-right corner of the report.
- Select Download CSV to export your keyword data. Alternatively, choose Download PDF for a formatted report.
How do I export data from Local Search Grid?
- In the BrightLocal dashboard, go to Local SEO Tools > Local Search Grid.
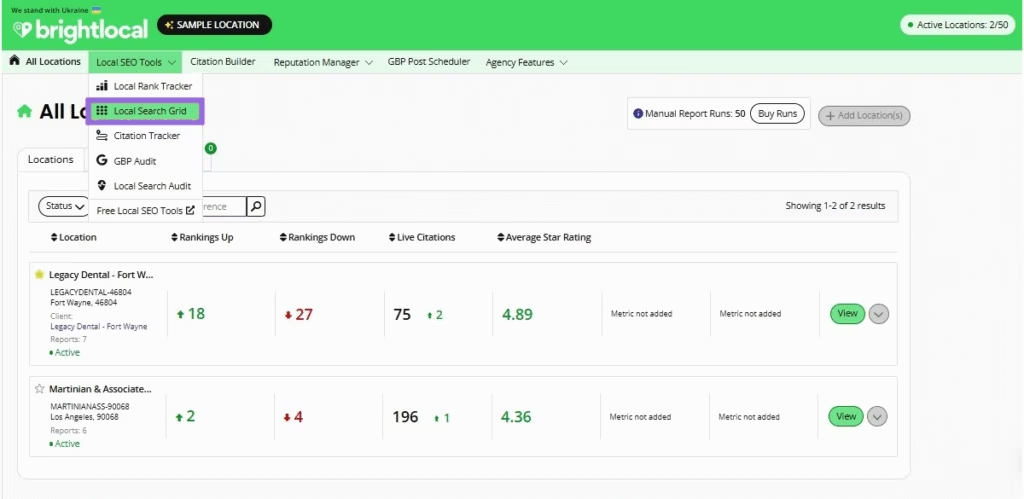
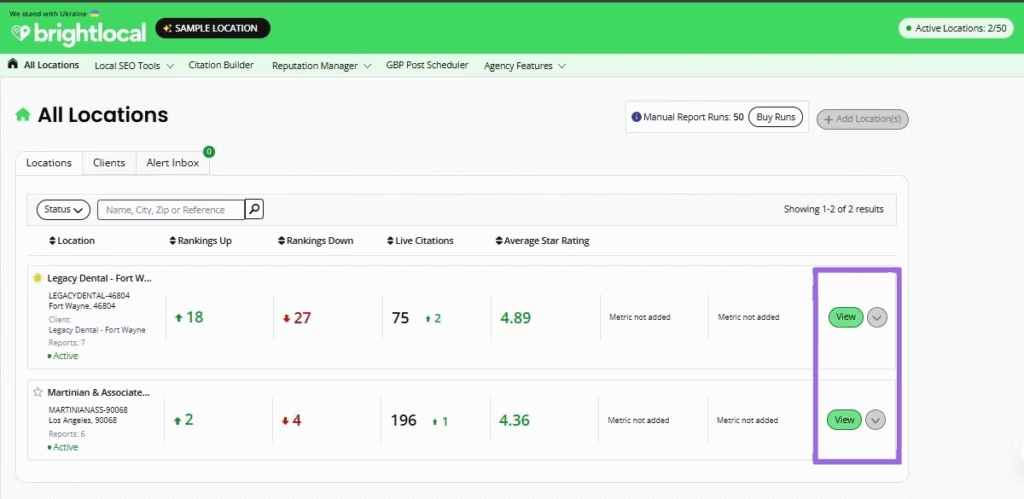
- Click View on your business (e.g., “Legacy Dental – Fort Wayne”).
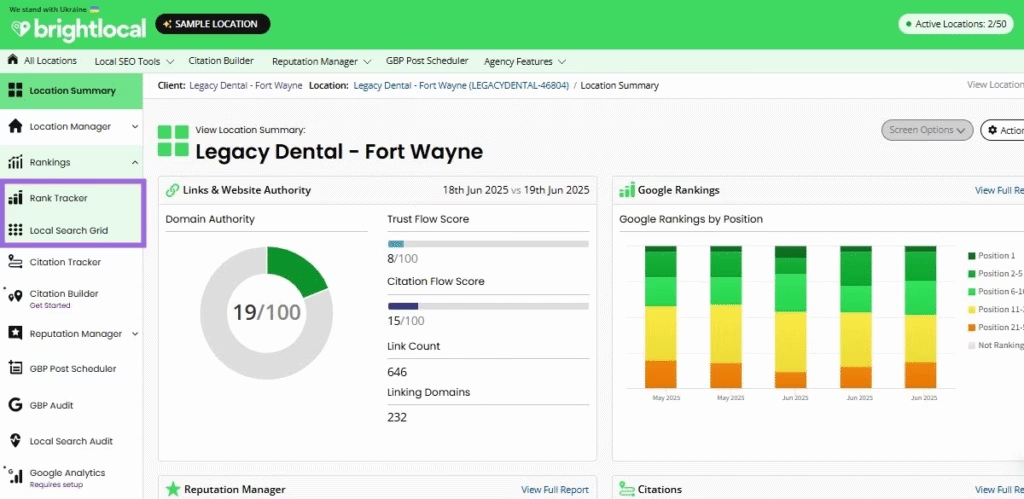
- Go to Rankings >Local Search Grid.
- Open the generated report for your selected keyword.
- Use the Select Keyword dropdown to switch between keywords if needed.
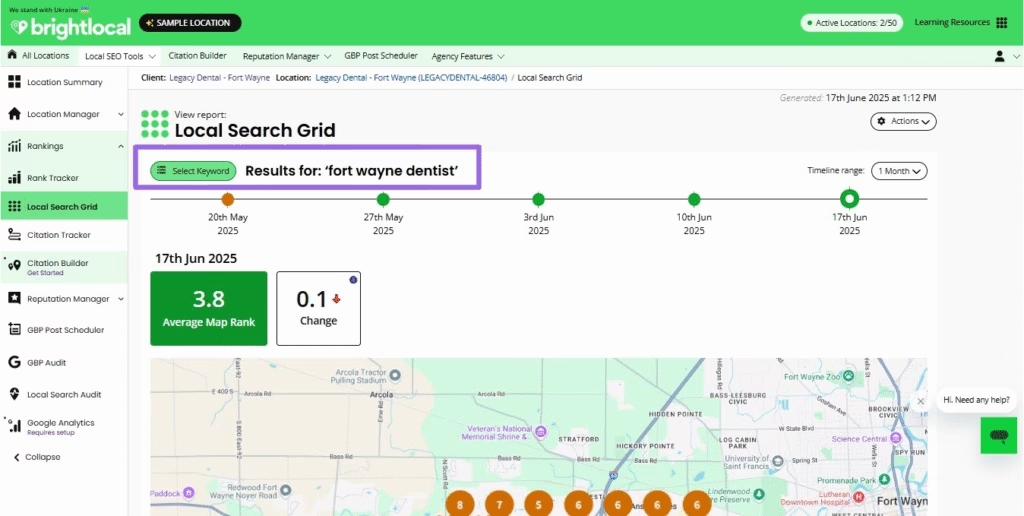
- Select the keyword for the report you want to generate.
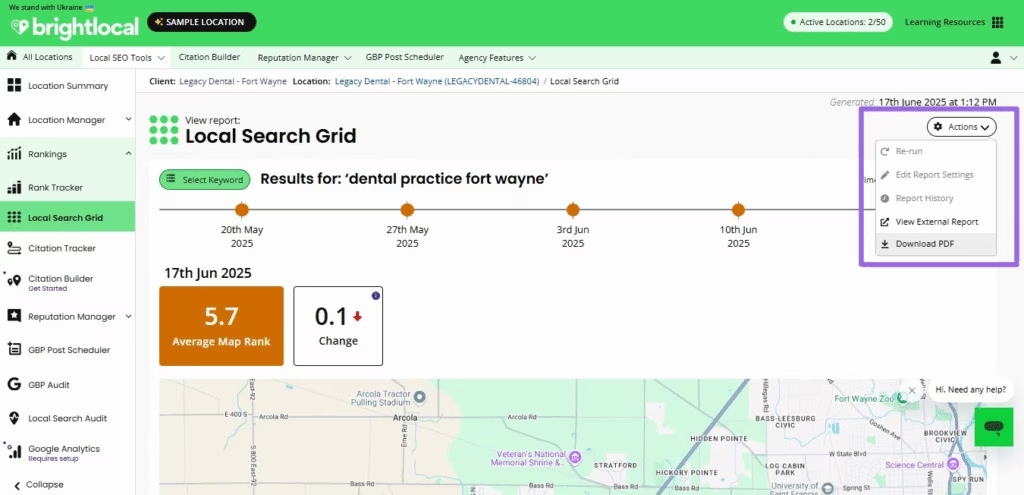
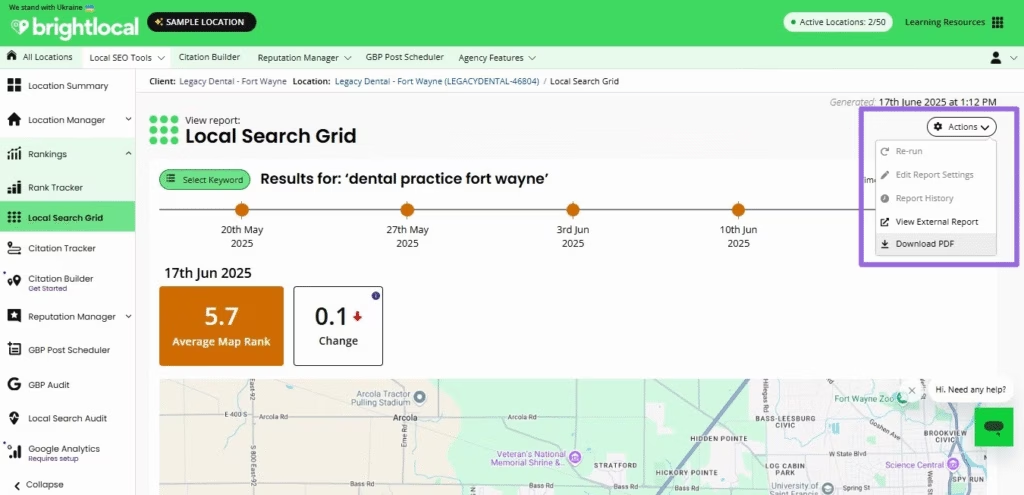
- Click Actions > Download PDF to export the grid report. CSV export is not available for Local Search Grid reports.
How do I set up local keyword tracking in Search Atlas?
Set up your project, connect your Google Business Profile (GBP), and configure the heatmap with the keywords you exported.
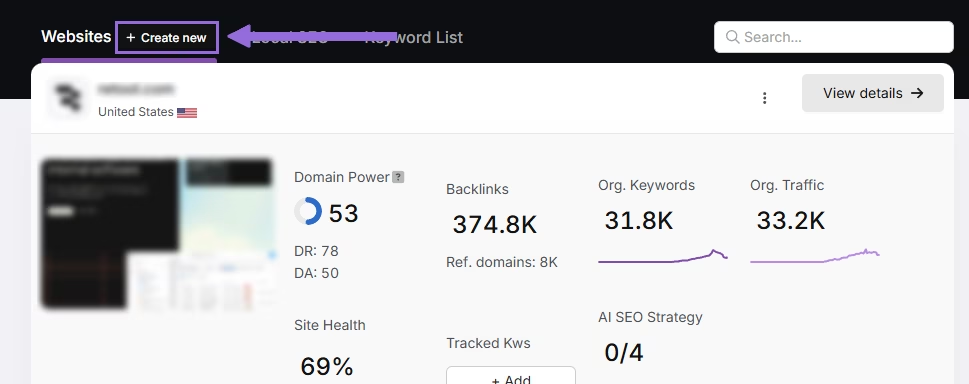
- Go to Local SEO > Connect GBP in your Search Atlas dashboard and link your verified local business.
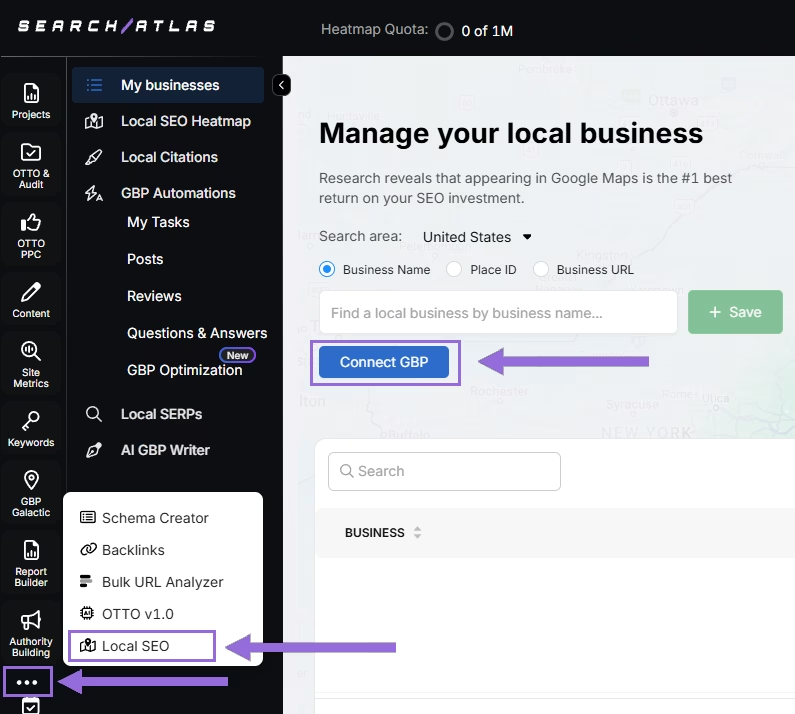
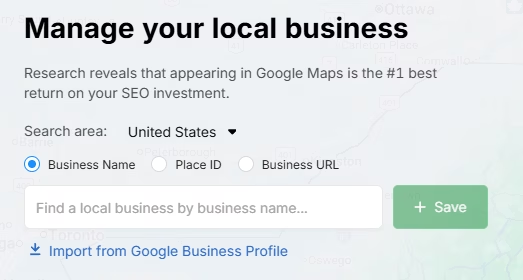
You can search for the business name exactly as it appears on your GBP, paste the Google Maps URL, or import accounts directly if you’ve already synced your GBP credentials in the main settings.
- Click + Save to create the project.
- After the project is saved, go to Local SEO > Local SEO Heatmap.
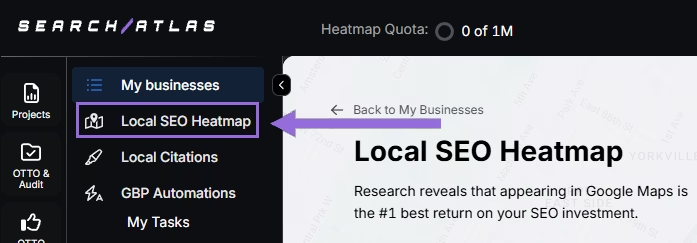
- Enter the keywords from the CSV file you exported from BrightLocal’s Rank Tracker, and click Run Local Scan.
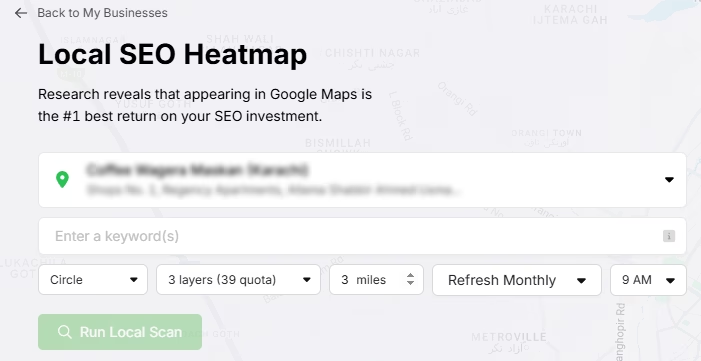
Choose between a circle or a rectangle to define the map area, then set the radius. We recommend using more layers or grids for a larger mile radius to increase tracking density.
You can also set the refresh intervals (e.g., weekly, monthly) and choose specific times when your business is open to get the most accurate performance data.
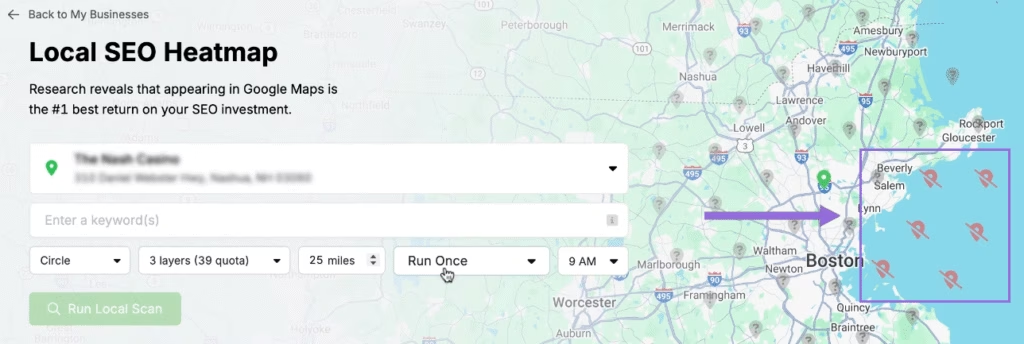
To save your quota and avoid skewed data, click individual pins on the map to omit unnecessary ones from the scan, such as pins located in parks, lakes, or uninhabited areas.
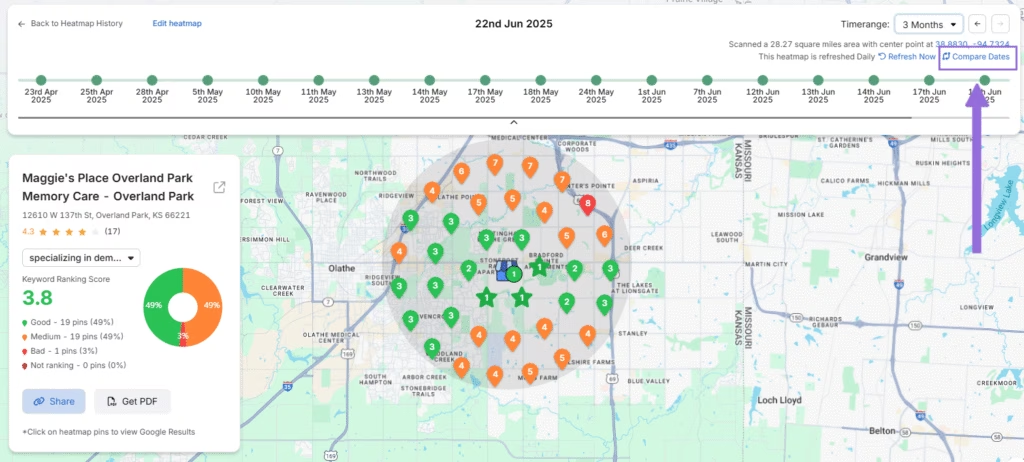
Once a scan is complete, click any pin to see your ranking position for that specific geographic point.
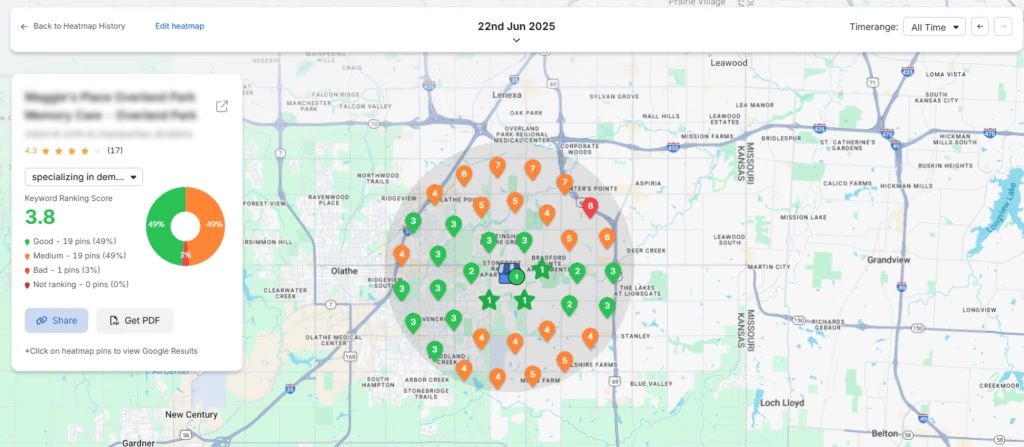
Use the Date Comparison feature to track your own ranking improvements over time.
How do I automate GBP management with GBP Galactic?
Go to GBP Galactic > GBP Projects to see an overview of your project’s profile, including a GBP Score (how complete your profile is), Average Rank, Citation Score, rating, reviews, and posts.
How do I automate GBP Posts?
- From the main menu on the left, navigate to the GBP Galactic suite and click the Posts tab.
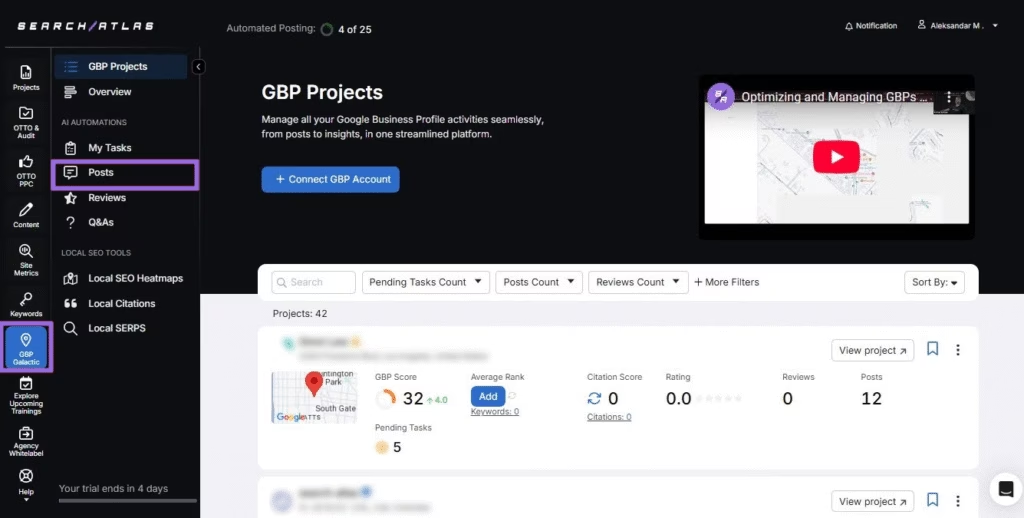
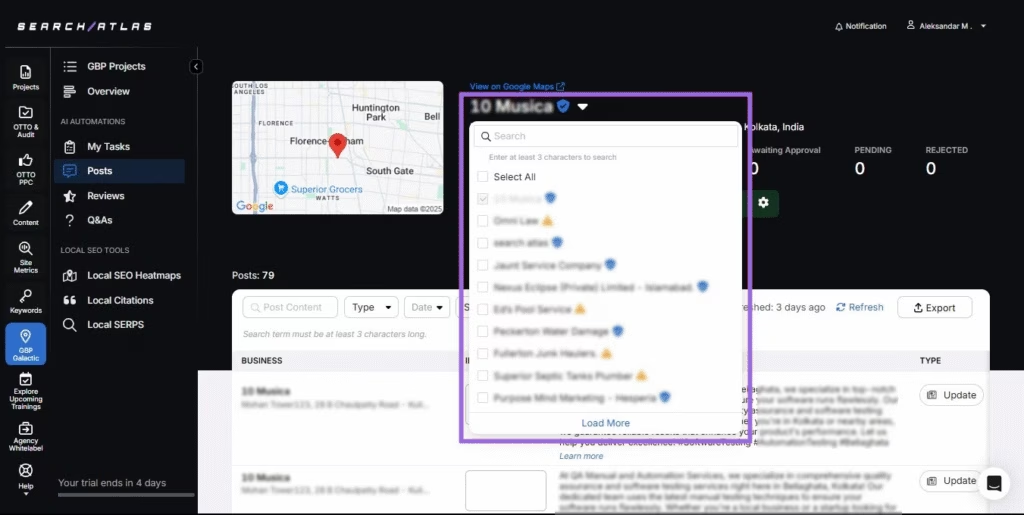
- Search for the GBP or use the filters to find it.
- Find the Automated Posting status indicator and click Settings to open the configuration panel.
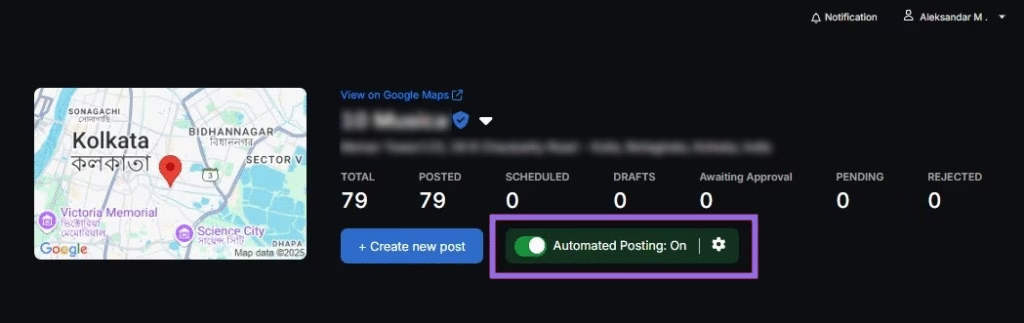
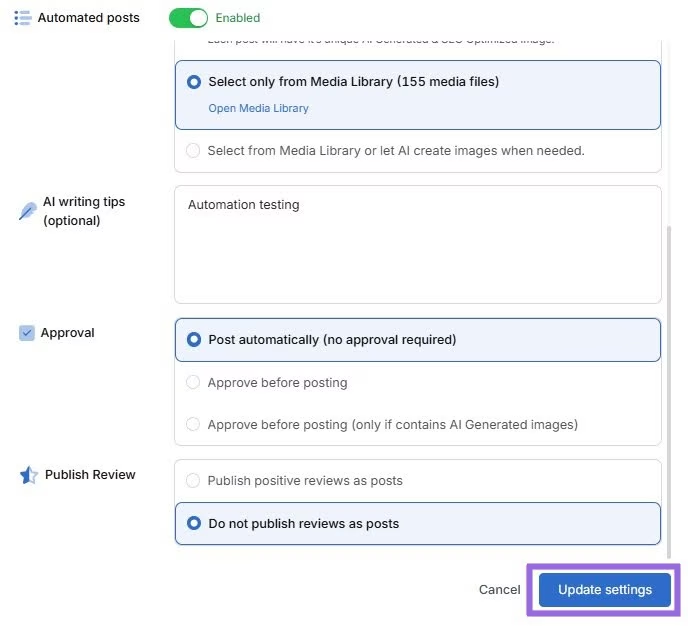
A settings window will appear where you can define the rules for the AI. You can configure the following options:
Post Frequency
Set a custom schedule (e.g., 3 times per week), or let OTTO analyze your business profile and determine the optimal posting frequency.
Start Date
Choose the date when you want the automated posts to begin.
Image Source
Let GBP Galactic generate images based on your business information or use existing photos from your GB Photos.
AI Writing Tips
Provide instructions, brand voice guidelines, keywords, or topics for the AI to follow when it generates post content. More detail can help improve the output.
Approval Process
You can allow posts to publish automatically without intervention.
Alternatively, select the Approve Before Posting option. Each AI-generated post will be sent to your My Tasks section for you to approve, edit, or reject before it goes live.
Publish Reviews as Posts
Enable this option to automatically repurpose positive customer reviews into GBP Posts. You can add a keyword filter so it only uses reviews that mention a specific term.
After configuring these settings, click the Update Settings button to activate post automation for your selected business.
How do I automate Q&A management?
- Go to GBP Galactic > Q&As.
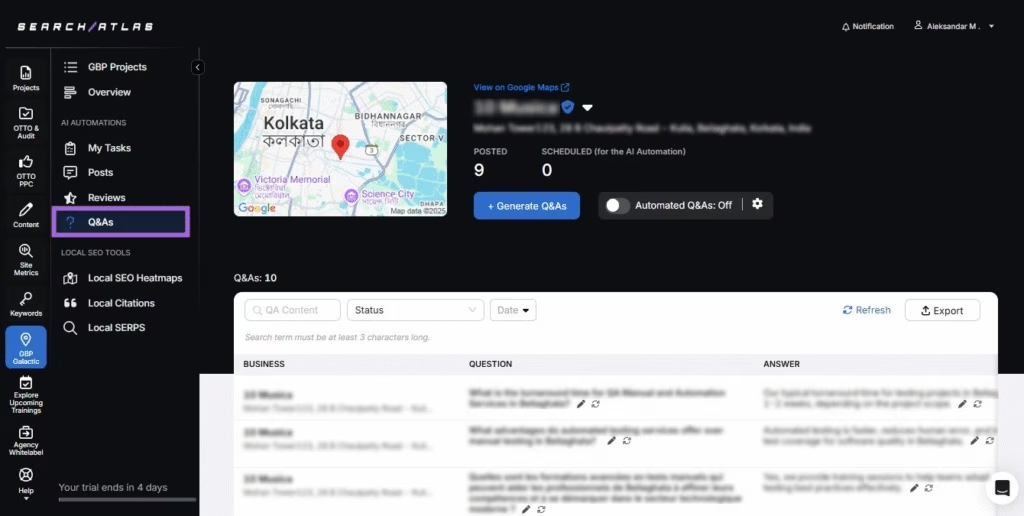
- Select the GBP from the dropdown menu.
- Enable the Automated Posting feature and open the settings.
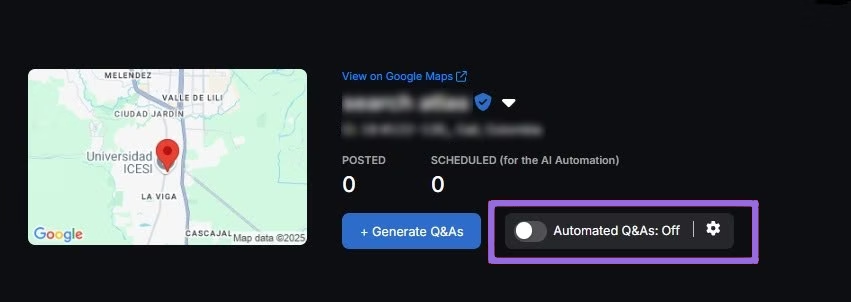
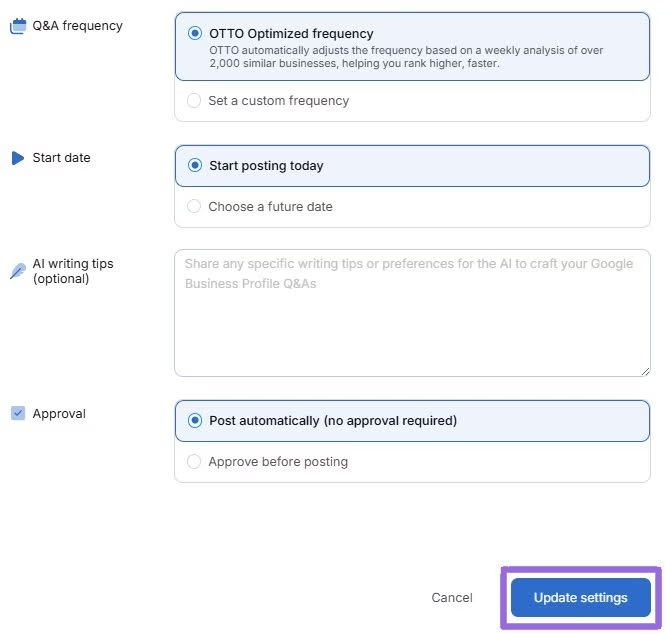
Configure the automation rules:
- Post Frequency
- Start Date
- AI writing tips
- Approval process
Click the Update Settings button to activate your custom settings.
How do I manage and automate reviews?
- Go to GBP Galactic > Reviews.
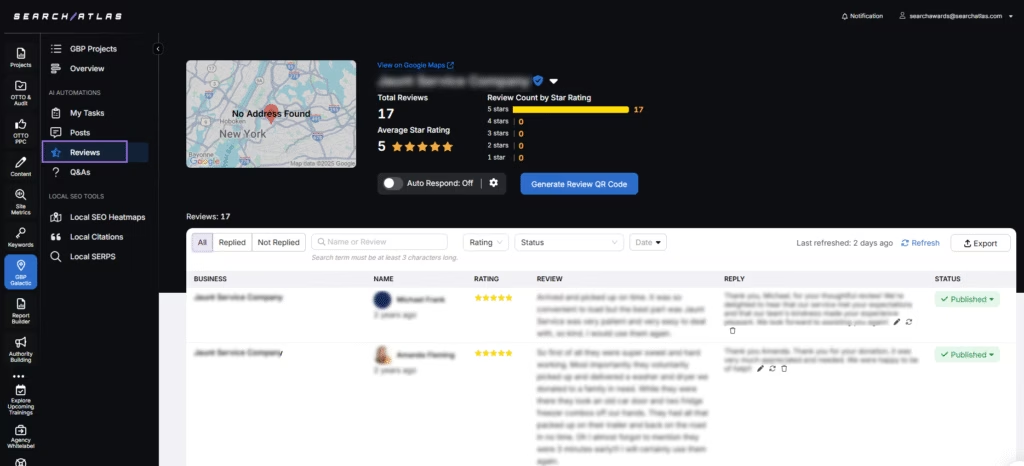
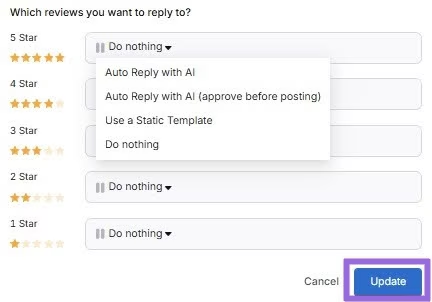
- Set up automation for responding to unanswered reviews.
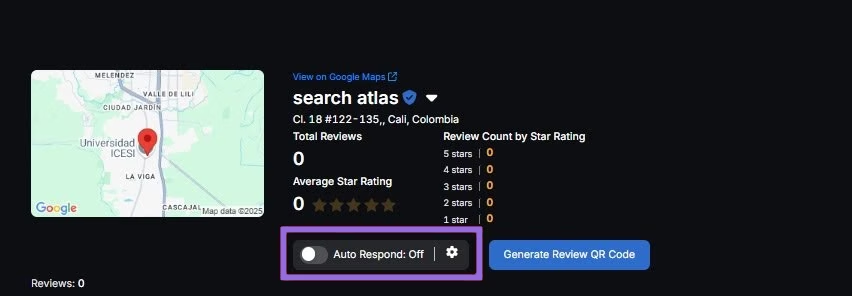
You have two main options:
- Use AI-generated replies that are context-aware.
- Create static templates for different star ratings (e.g., a specific reply for all 5-star reviews and a different one for all 3-star reviews).
Define the desired tone of voice, length, and language for AI-generated responses so they align with your brand.
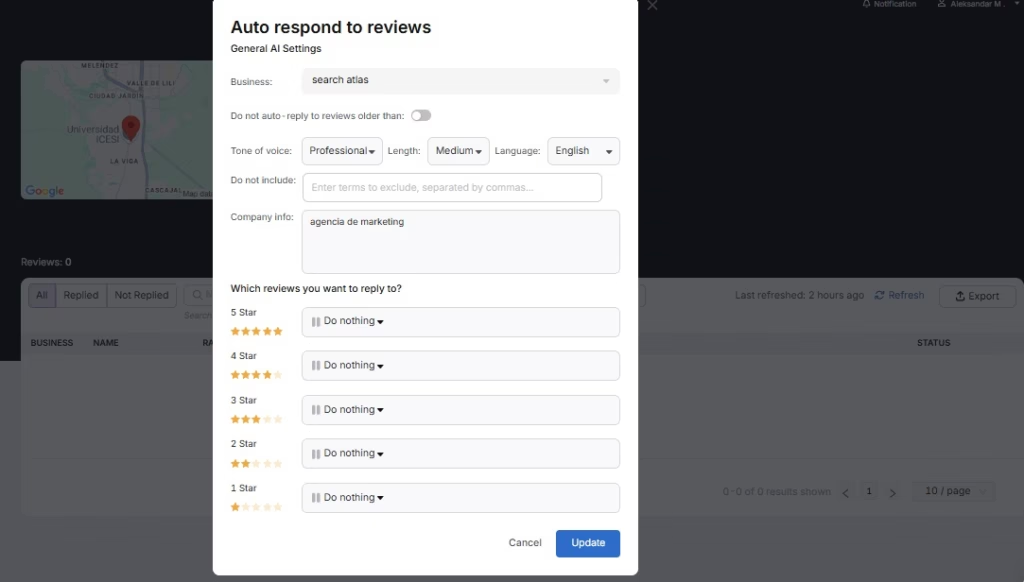
Click the Update button to activate your custom settings.
How do I request new reviews?
- Go to Reviews > Generate Review QR Code to request reviews.
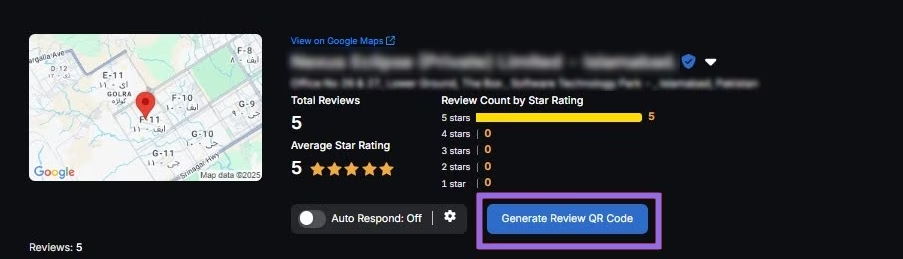
The tool generates a direct link to your GBP review form and a QR code that links to the same form.
Print the QR code and place it on your business counter, on receipts, or in marketing materials to encourage customer feedback.
How do I automate GBP tasks?
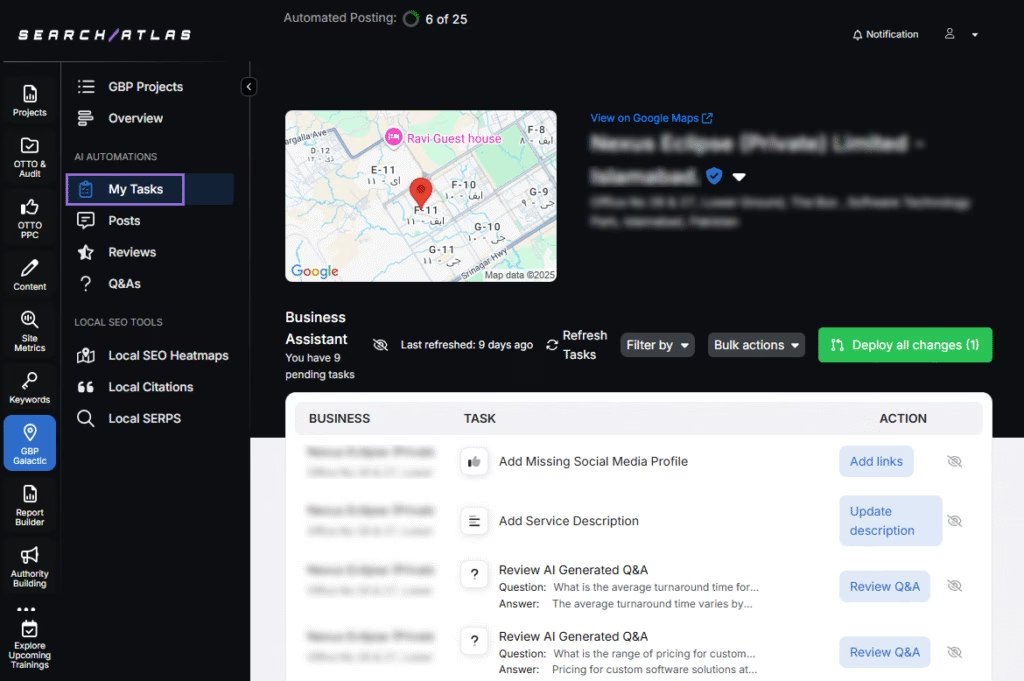
- Go to GBP Galactic > My Tasks to manage automated GBP Galactic tasks, including adding missing social media, service descriptions, Q&As, links, categories, and more.
You can:
- Filter by type of task, such as GBP Optimization, Posts, or Questions.
- Deploy all changes in 1 click.
- Approve each task separately.
- Ignore tasks.
How do I set up local citation building?
Search Atlas can submit your business data to five data aggregator networks. This is a one-time process paid for with Hyperdrive credits, not a recurring subscription.
How do I submit my business data?
- Go to Dashboard > GBP Galactic or Local SEO > Local Citations.
- Select the desired business name from the dropdown menu. Ensure the correct Google Business Profile is linked.
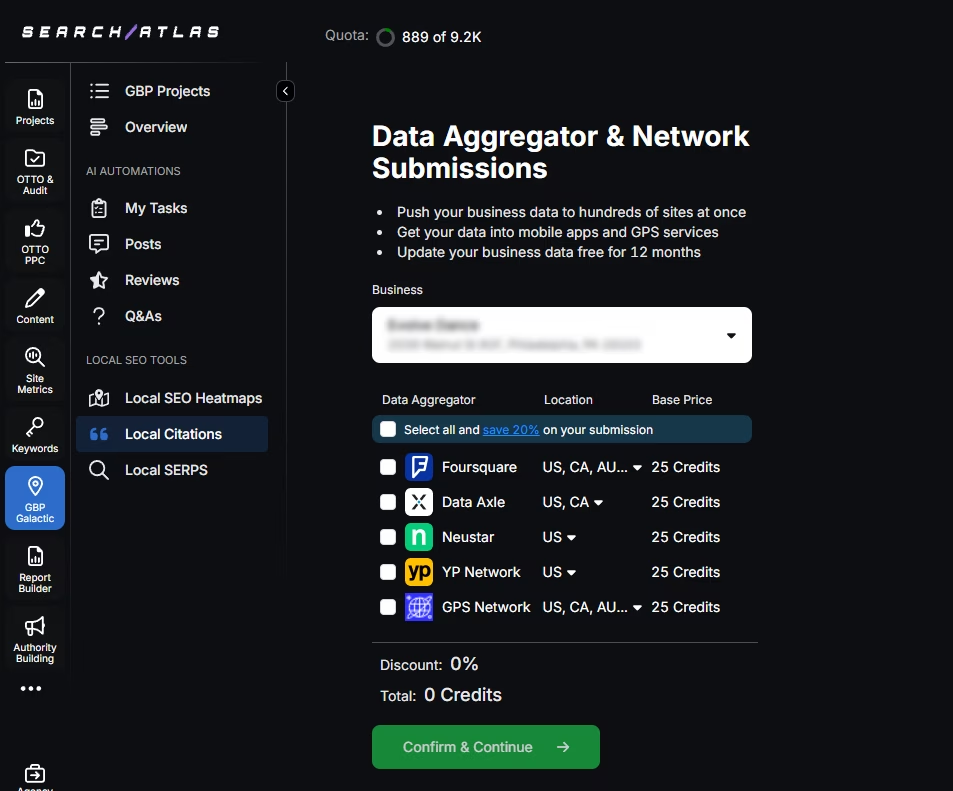
- Choose the Data Aggregator Network(s) you want to submit to. The options are Data Axle, Foursquare, Neustar Localeze, Yellow Pages Network, and GPS Network.
- Click the three dots to review the pre-filled business details and provide any additional details required.
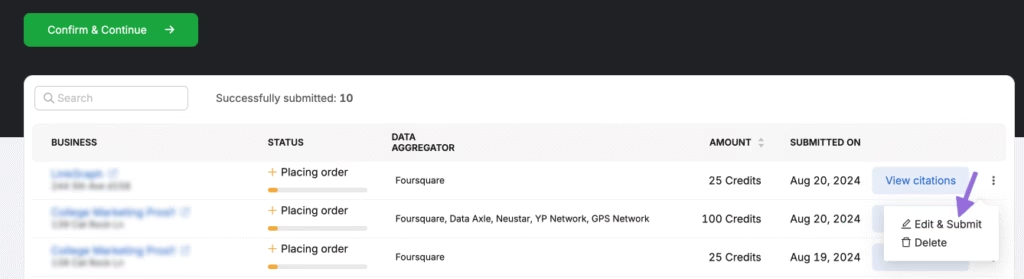
- Click Submit to finalize the process.
The data will begin to appear on the Citation Listing screen.
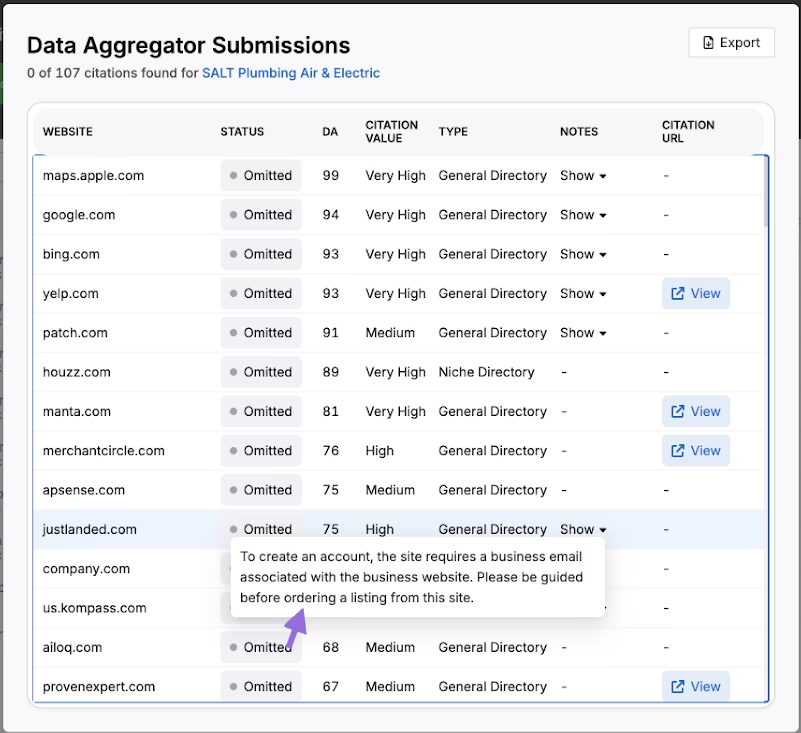
What happens after submission?
The process spans approximately 40–45 days, depending on the aggregators. You can update submitted details later for free if needed.
A complete report with live and updated citations will be available after four weeks.
How do I set up white-label reports?
Search Atlas white-label settings include client-specific reports, branded dashboards, and tools for managing services and customer interactions.
What should I export from BrightLocal?
Log in to your BrightLocal account and download any final PDF reports you wish to keep for historical comparison before making the switch.
How do I configure white-label settings in Search Atlas?
- Go to Dashboard > Agency Whitelabel.
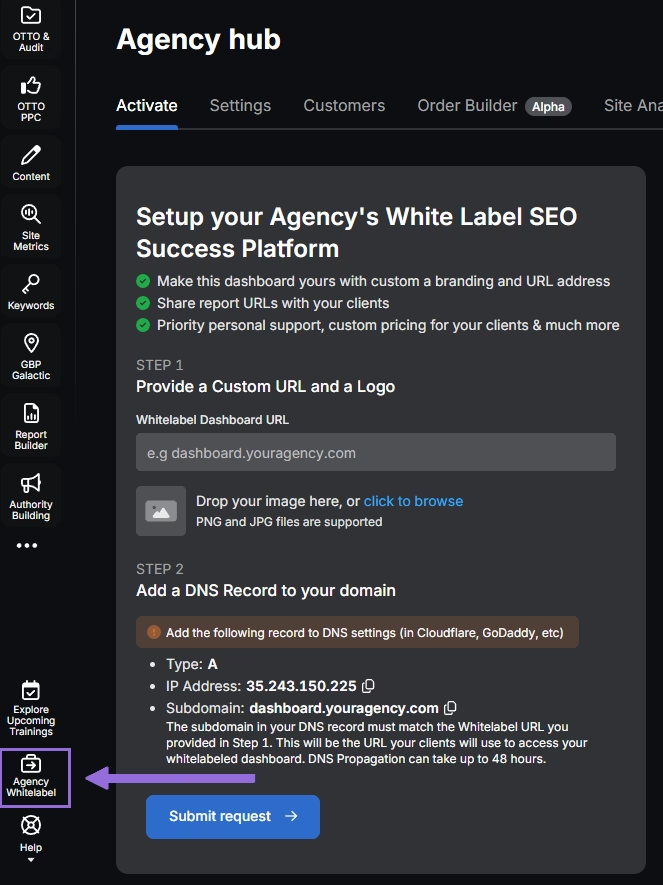
- Click the Settings tab to configure your brand’s appearance.
- Upload your assets: add your Agency Logo, Sign-in Logo, Sign-up Logo, and Favicon.
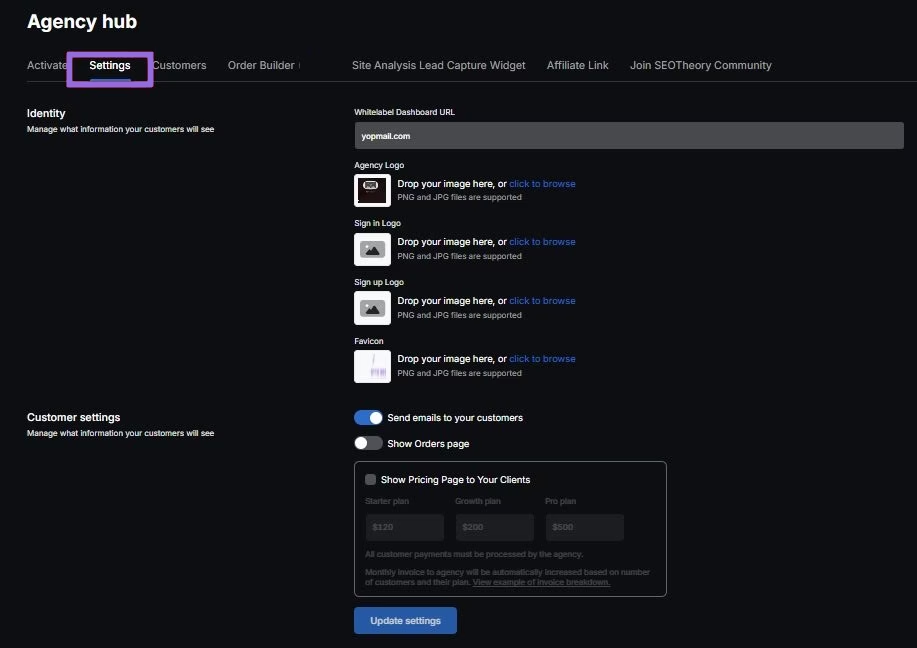
Use the Customers tab to add client accounts, assign specific plans to them, and manage their access permissions.
Once these settings are saved, the platform is white-labeled.
Any report you share via a link or iframe will use your custom URL and feature your logo.
How can I get help with Search Atlas onboarding?
Where can I watch tutorial videos?
Search Atlas offers step-by-step tutorials on YouTube to help you set up reports, dashboards, and automations.
Can I book a 1:1 onboarding session?
During your trial, you can schedule a 1:1 onboarding session directly from the dashboard. A product expert can help you customize your setup, connect integrations, and configure OTTO SEO for automation.
What is included in the onboarding email campaign?
When you start your free trial, you’ll receive a 7-day onboarding email sequence. Each email walks you through a core feature.
Where can I find technical documentation?
Access the technical docs via the Help Center for instructions on using the tools.